
Cutting discarded wine bottles into durable tumblers is one of the most rewarding small workshop projects you can tackle over a weekend. Glass packaging is engineered to hold carbonation, withstand transit shocks, and resist chemical degradation, which makes empty wine and cider bottles fantastic raw material for tabletop ware. Yet glass also keeps internal tension from the manufacturing mold, meaning it requires deliberate scoring and controlled temperature shocks rather than brute force. When approached methodically, you get smooth, cylindrical drinking glasses that outlast commercial thin-walled barware.
The entire workflow relies on four mechanical realities: finding a bottle without structural flaws, creating a single continuous score line around the perimeter, running alternating temperature baths to complete the fracture, and hand-lapping the rim until it is smooth enough for lips and dishwashers. If you rush through any single part of the sequence, the glass will split diagonally or develop wandering fracture lines. Setting up a dedicated workspace with cold tap water, a kettle, basic hand tools, and wet silicon carbide sandpaper will keep your results predictable.
Selecting suitable bottles with consistent wall thickness
Not all wine bottles behave the same way under thermal stress. Mass-market standard Bordeaux and Burgundy bottles made from flint (clear), amber, or antique green glass are the easiest to work with. These bottles typically feature a wall thickness between 2.5 millimeters and 4.0 millimeters. Sparkling wine and champagne bottles might seem like premium candidates due to their heavy weight, but their walls frequently measure 5.0 millimeters to 7.0 millimeters. That extra mass resists rapid thermal shock, which often causes the score line to drift or the base to crack unevenly.
Look closely at the heel, the shoulder, and the vertical mold seam running up the side of the container. Bottles produced by lower-tolerance automated blow-molding often have an eccentric interior bore, meaning one side of the cylinder might be 4.2 millimeters thick while the opposite side is only 2.1 millimeters. When dipped into boiling water, the thin side expands faster than the thick side, resulting in an uneven break. Hold the empty bottle up to a bright bulb and rotate it slowly. If you spot heavy waviness, large trapped air seeds, or an obviously lopsided punt (the indentation at the base), set it aside for the recycling bin rather than the cutter.
| Bottle Style | Average Wall Thickness | Suitability for Cutting | Thermal Separation Tendency |
|---|---|---|---|
| Standard Bordeaux (750 ml) | 2.8 mm to 3.2 mm | Excellent | Fast, straight split along score line |
| Burgundy / Pinot Noir (750 ml) | 3.0 mm to 3.5 mm | Very good | Reliable, clean break on cylindrical body |
| Champagne / Traditional Sparkling | 5.5 mm to 6.8 mm | Challenging | Prone to stepping, requires extra thermal cycles |
| Square Spirit Bottles | 3.0 mm to 5.0 mm (corners vary) | Poor for beginners | Cracks turn inward at 90-degree radii |
Clean each candidate thoroughly before bringing it to your workbench. Remove paper labels and adhesive completely using hot water and baking soda or an adhesive remover. Sticky residue catches on guide wheels and scoring jigs, which causes the cutting wheel to skip or jump. Dry the exterior with a lint-free cloth so the cutting wheel can maintain uniform contact with bare glass.
Building a simple jig for straight bottle scoring
Freehand scoring with a glass cutter produces wobbly rims that require hours of grinding to level. A dedicated jig ensures the bottle rotates along its central axis while maintaining uniform pressure against an immobilized tungsten carbide wheel. You do not need to buy an expensive commercial rig; you can assemble a rock-solid jig in twenty minutes using scrap dimensional lumber, a few wood screws, and a standard handheld glass cutter.
Fasten two lengths of 1x2 pine or hardwood parallel to each other on a flat piece of 3/4-inch plywood, spaced roughly 2 inches apart. This forms a cradle that holds the cylindrical body of the bottle while letting it spin freely in place. At one end of the cradle, mount a perpendicular backstop block against which the base of the bottle rests. This backstop controls the overall height of your finished drinking glass. For a comfortable 12-ounce tumbler, set your score line between 3.5 inches and 4.5 inches from the base.
- Mounting the cutter: Clamp or screw your handheld glass cutter to an adjustable upright block, positioning the cutting wheel so it contacts the bottle wall at a direct 90-degree angle.
- Applying lubrication: Place three drops of light mineral oil or cutting oil directly onto the tungsten carbide wheel before each cut. Oil reduces friction, prolongs wheel life, and prevents tiny micro-flakes from jamming the axle.
- Executing the rotation: Press the bottom of the bottle firmly against the wooden backstop with your left hand, apply moderate downward pressure onto the cutter with your right hand, and rotate the bottle toward yourself in a single, smooth rotation.
Listen carefully to the sound of the wheel. You want a crisp, gentle unzipping sound, like paper tearing. Avoid pressing down with excessive force, which crushes the glass surface and produces white, powdery shards. Most importantly, stop spinning the instant the wheel meets your starting mark. Over-scoring by rolling past the initial cut damages the cutting wheel and creates splintered junctions where cracks can wander off track.
The hot and cold water cycle for clean thermal separation
The score line you create does not cut through the glass; it merely introduces a localized surface fault with high tensile stress. To turn that hairline weakness into a complete break, you must apply thermal shock. This method expands and contracts the glass directly across the scratch line until the fracture travels all the way through the bottle wall.
Prepare two water stations next to a sink. Station one is a heat-safe basin or deep pot filled with water brought to roughly 200 degrees Fahrenheit, just below an active rolling boil. Alternatively, you can use a narrow-spout electric kettle to pour hot water directly over the score. Station two is an insulated bucket filled with cold tap water and ice cubes, maintaining a temperature near 40 degrees Fahrenheit. The greater the temperature differential between the two baths, the more decisively the crack propagates.
- Submerge the scored zone of the bottle into the near-boiling water for 15 to 20 seconds, rotating it steadily so heat transfers evenly around the entire circumference. If pouring from a kettle, direct a thin stream directly over the score line while turning the bottle over your sink.
- Transfer the bottle immediately into the ice bath, submerging it past the cut line for 10 to 15 seconds. You will often hear a light clicking or ticking sound during the cold dip, which signals that the fracture is travelling through the wall.
- If the top does not drop off cleanly during the first shock, repeat the process. Return the bottle to the hot water for another 12 seconds, then back to the ice water. Most wine bottles release cleanly during the second or third cycle.
Never try to twist or force the two halves apart with your bare hands while thermal separation is underway. If the bottle needs encouragement after four cycles, wrap it in a thick shop towel and apply gentle outward pulling pressure. If it still resists, let the bottle return to room temperature, inspect the score for unworked gaps, and try a fresh bottle rather than wrestling with a stubborn blank that might shatter unpredictably.
Sanding grits and wet-polishing techniques for safe rims
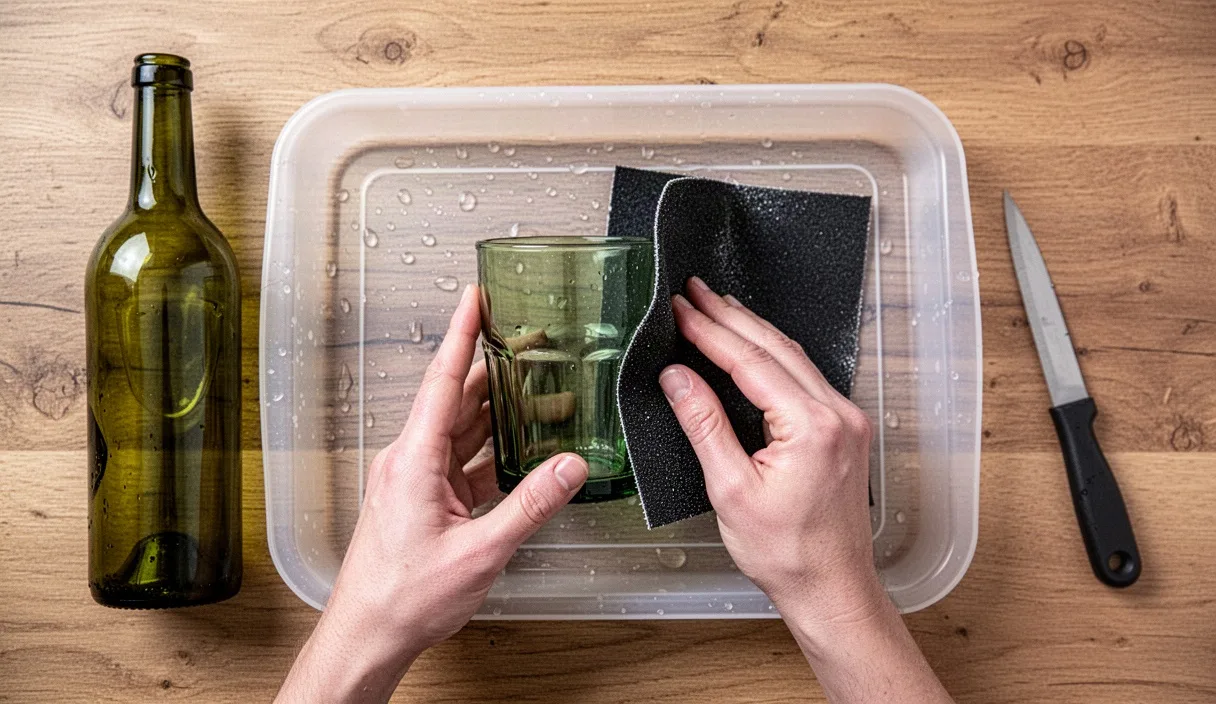
Freshly separated bottle rims are razor sharp and frequently retain microscopic shark-tooth spurs. Transforming that raw edge into a comfortable, food-safe drinking rim requires progressive wet sanding. Never sand glass dry. Dry sanding releases respirable silica dust into your room, which is hazardous to inhale, and it overheats the glass edge, creating fresh cracks that weaken the tumbler.
Work on a flat reference surface, such as a thick plate of glass or a flat scrap of granite countertop. Place a full sheet of waterproof silicon carbide sandpaper flat against the plate, splashing generous amounts of water onto the surface to act as both a lubricant and a dust trap. Start with 80-grit or 120-grit paper to flatten the primary edge. Hold the tumbler perpendicular to the flat plate and move it in a steady figure-eight pattern. The figure-eight motion ensures that downforce remains balanced and prevents you from grinding down one side faster than the other.
| Sanding Stage | Silicon Carbide Grit | Primary Objective | Estimated Time per Glass |
|---|---|---|---|
| Flattening | 80 to 120 grit | Level high spots, remove fracture spurs, true the top plane | 3 to 5 minutes |
| Chamfering | 180 to 240 grit | Break inner and outer sharp corners, create 45-degree bevels | 2 to 3 minutes |
| Refining | 400 grit | Remove coarse scratching, soften the contact profile | 2 minutes |
| Satin Finishing | 800 to 1200 grit | Produce silky, satin texture ready for mouth contact | 2 minutes |
Once the rim sits perfectly flat on the 120-grit sheet, shift your attention to the inner and outer corners. Wrap a piece of wet 240-grit sandpaper around a wooden dowel or a piece of dense foam pipe insulation to bevel the inside rim. Sand the outside corner with a small handheld sanding block, holding it at a 45-degree angle to create an intentional, rounded bullnose profile. Progress through 400-grit and finish with 800-grit or 1200-grit wet paper. When finished, the rim should feel as silky and smooth as a factory-made water goblet.
Checking for micro-fissures before daily use
Before a finished glass makes its way into your kitchen cabinet, you must inspect it for hidden internal fractures. A tumbler can feel smooth to the touch yet harbor a sub-surface stress crack that will split open unexpectedly when filled with ice or exposed to hot dishwasher cycles. Taking five minutes to inspect each piece protects you from messy spills and cuts down the line.
Dry the glass completely and bring it into a dark room or under a shaded desk lamp. Take a high-output LED flashlight and direct the beam directly into the polished rim at a shallow 15-degree angle. Look through the sidewalls from the outside. If there are micro-fissures, the focused light will hit the fracture plane and reflect as a bright, glowing silver mirror or thin white needle inside the glass wall. If you spot a fissure running vertically downward from the rim more than 2 millimeters, the glass cannot be trusted for beverage service.
You can also perform a basic acoustic resonance check. Hold the glass lightly by its bottom base using the tips of two fingers, making sure nothing touches the sidewalls. Tap the rim gently with the wooden handle of a butter knife or a pencil. A structurally sound glass rings with a clear, sustained musical chime that sustains for two or three seconds. A glass with a hidden internal crack produces a dull, flat thud that decays almost instantly. If a tumbler fails either test, repurpose it as a desktop pencil holder or a candle sleeve where it will not be subjected to thermal changes or mouth contact.
Common mistakes to avoid
Most failed bottle projects come down to a handful of recurring slip-ups in technique. The most frequent error is retracing the score line. It feels intuitive that rolling the wheel over the same spot three times makes the cut deeper, but in practice, doing so fractures the microscopic trench, dulls your tool, and guarantees a jagged rim with stepped breakout edges. Score the glass once, with steady confidence, and stop.
Another routine misstep is ignoring the cooling water temperature. If your cold water tub rises above 65 degrees Fahrenheit after processing three or four warm bottles, the temperature differential drops, and the shock becomes sluggish. Keep a supply of ice nearby to maintain cold bath temperatures near 40 degrees Fahrenheit. Lastly, never skip the intermediate sandpaper grits. Jumping straight from rough 80-grit paper to ultra-fine 1000-grit leaves microscopic valleys in the glass that can pinch lips and collect mineral deposits over time.
Next steps for your home glassware collection
Once you dial in your scoring jig and thermal technique, you can complete a matching set of four tumblers in roughly two hours. Start by setting aside three or four identical bottles from your regular home recycling or ask a local cafe for a few matching empties. Working with identical bottles lets you keep your jig settings fixed, which produces uniform heights and rim profiles across your entire set.
As you build confidence with standard wine bottles, you can experiment with small apothecary jars, amber beer bottles for juice glasses, or wide-mouthed olive oil bottles for kitchen prep dishes. Keep a dedicated plastic storage bin for your wet-sanding sheets, scoring jig, and safety gear so you can set up on a garage bench or patio table whenever a unique piece of glass packaging catches your eye. Enjoy the process of giving durable glass containers a second life on your dining table.