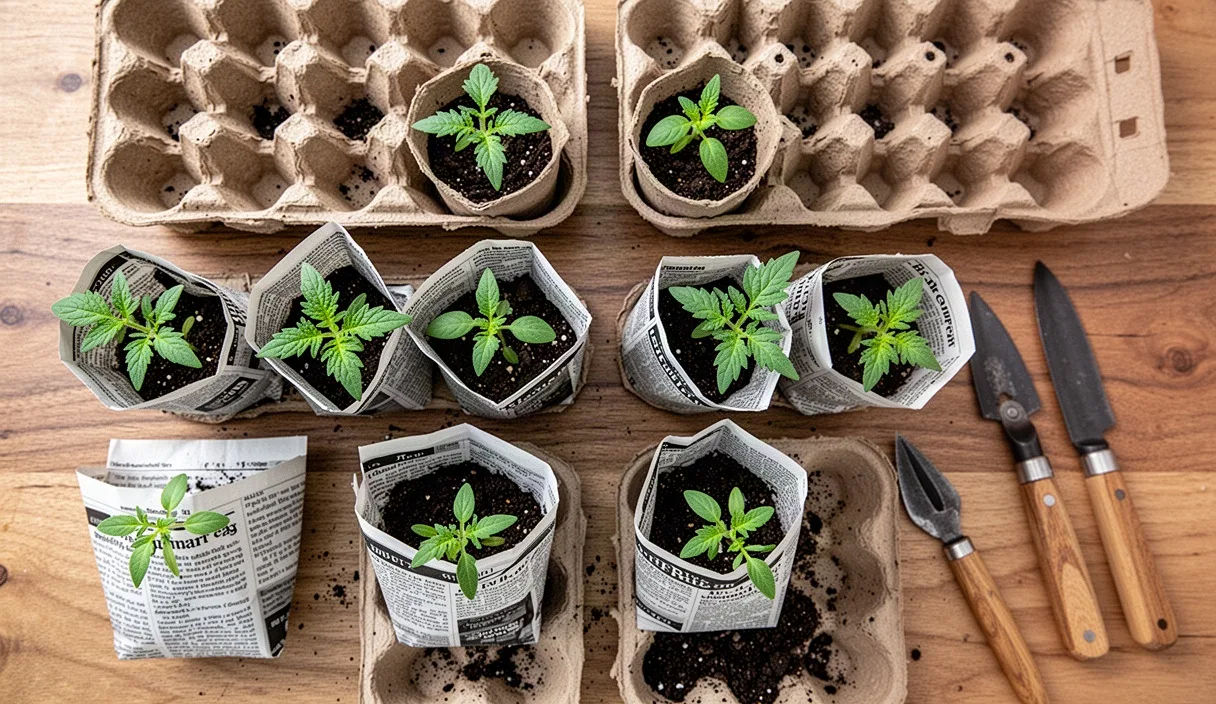

Every spring brings the same urge to turn wastepaper into a nursery. Instead of buying plastic plug trays, home gardeners often choose between two kitchen counter staples: cardboard egg cartons and folded newspaper. Both cost nothing extra, both compost down in a garden bed, and both promise to spare tender roots the shock of being yanked from a rigid plastic cell. Yet their performance under shop lights is remarkably different, and using the wrong one for the wrong crop often ends in stunted greens or soggy pulp on the windowsill.
To compare them fairly, we tracked sixty seedlings across four weeks under identical indoor conditions: sixty-eight degrees Fahrenheit ambient temperature, fourteen hours under balanced T5 fluorescent tubes, and bottom-watering using shallow baker trays. Thirty seeds went into standard pressed wood-pulp egg carton cups, and thirty went into handmade broadsheet newspaper cylinders. Here is what happened to the paper, the soil moisture, and the roots before and after transplanting outdoors.
The folding technique for sturdy newspaper cups
The main complaint about newspaper pots is that they unravel the moment they get wet. That failure usually happens because people roll them too thin or rely on masking tape, which dissolves under water. A three-ply cylinder wrapped around a common glass bottle and secured with an envelope fold stays rigid for six weeks without any glue, staples, or twine.
Standard newsprint printed with non-toxic, soy-based ink works best. Avoid glossy advertising inserts, thick magazine paper, or heavy color flyers, as the clays and coatings on those sheets slow water absorption and shed persistent residues into your soil. A sheet measuring roughly seven inches wide by sixteen inches long gives you the right ratio of wall strength to base density.
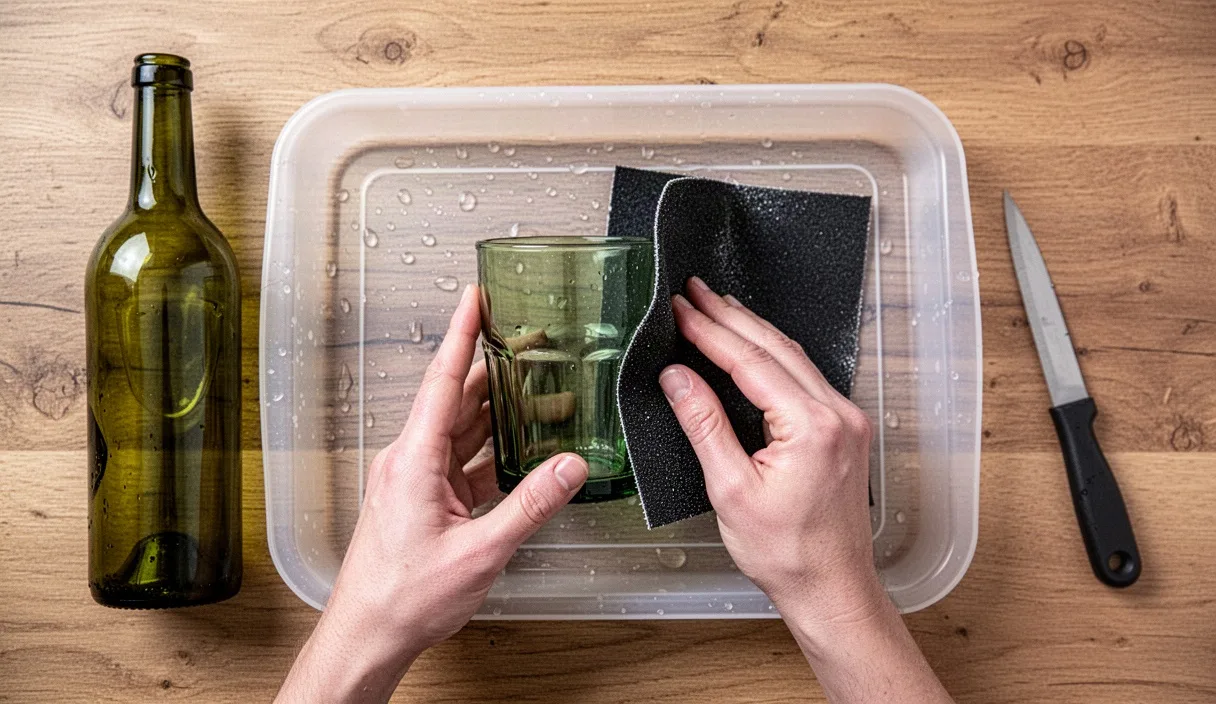
- Prepare the form: Find a smooth glass beverage bottle or wooden dowel with a diameter between two and two-and-a-half inches. Straight sides make sliding the paper off much simpler than tapered wine bottles.
- Fold the band: Lay your newspaper strip flat. Fold the top edge down by two inches along its entire length. This folded rim provides a double-thick collar that keeps the top of the pot circular when filled with soil.
- Roll around the cylinder: Place the bottle on the paper so that two-and-a-half inches of paper overhangs the base of the bottle. Roll the paper loosely around the glass. Rolling too tightly makes the finished cup nearly impossible to slip off the glass.
- Tuck the base: Push the overhanging paper inward against the base of the bottle. Work in quarter-turns, creasing four crisp triangles flat against the glass bottom, just like wrapping the bottom of a holiday package.
- Form the lock: Press the bottom against a hard wooden table and give the bottle a firm quarter-twist. Slip the cup off the bottle, reach inside with your thumb, and press the interior bottom seams flat against the work surface.
When completed properly, the pot stands independently with a wall height of roughly three-and-a-half inches and holds about six ounces of seed-starting mix. By comparison, an individual egg carton cup holds slightly less than two ounces of mix and stands barely one-and-a-half inches tall.
Moisture tests and mold risks on seedling trays
Egg cartons and newsprint manage water through capillary action, but their densities create opposite problems. Pressed wood-pulp egg cartons are dense and absorbent. When you bottom-water a plastic tray containing an egg carton, the carton absorbs the moisture within two minutes, drawing water upward like a sponge. Newspaper pots take between eight and twelve minutes to draw moisture to the soil surface, but their thicker soil mass holds that water far longer.
Because egg cartons hold so little soil volume, they dry out quickly under grow lights. During week two of our test, the egg carton cells required watering every twenty-four hours to prevent the soil surface from crusting. The newspaper pots, holding three times the soil volume, maintained a steady moisture level with watering every forty-eight to sixty hours. When life interrupted the schedule on day eleven and both trays sat unwatered for two full days, fourteen of the egg carton sprouts showed severe wilt, while all thirty newspaper sprouts remained upright.
| Container Type | Average Soil Volume | Watering Interval | Fungal Outbreaks (30 cells) | Wall Integrity at Day 21 |
|---|---|---|---|---|
| Pressed egg carton | 1.8 fl oz (53 ml) | 24 to 30 hours | 7 occurrences | Softened, bases intact |
| Hand-rolled newspaper | 6.2 fl oz (183 ml) | 48 to 60 hours | 2 occurrences | Firm, easily handled |
Mold risk is the second obstacle. White surface mold (primarily benign saprophytic fungi) appeared on seven egg carton dividers by day twelve. The dense wood pulp stays wet when airflow is limited, creating ideal conditions for fungal spores. The newspaper pots showed mold on only two pots, and only along the base seams where pots touched the wet watering tray. Increasing air movement with a gentle five-inch oscillating fan set on low eliminated new fungal growth on both trays within forty-eight hours.
Root expansion after three weeks of indoor growth
Seedlings do not wait for the gardener. By day fourteen, fast-growing roots hit the perimeter of their growing space. In egg cartons, the taproots of brassicas and nightshades strike the bottom of the shallow cup in less than ten days. Once a root hits the dense pressed cardboard bottom, it cannot penetrate the thick dry pulp, so it turns sideways and begins circling the cup perimeter.
By day twenty-one, the egg carton seedlings formed dense root balls that choked their own lower stems. Two tomato seedlings in the egg cells showed root tips growing up toward the surface because the bottom was packed tight. This root binding checked their vegetative growth, causing leaves to yellow slightly from poor nitrogen uptake despite identical fertilization.
The newspaper pots produced a healthier root architecture. The three-and-a-half-inch depth allowed primary taproots to descend naturally without bending. When lateral roots reached the inner newsprint wall, they encountered air pockets in the paper folds rather than an impenetrable barrier. The soft, moist paper allowed microscopic root hairs to work their way into the paper fibers without knotting into girdling coils. When we slid the paper off two test pots at day twenty-one, roots were distributed evenly throughout the entire soil column, displaying healthy white tips from top to bottom.
Transplanting ease and paper breakdown in outdoor soil
The true measure of a biodegradable pot is how easily it moves into garden soil and how fast it lets roots escape into the surrounding bed. Egg cartons require you to cut the individual cups apart with shears before planting. Trying to tear wet egg cartons by hand usually rips off the bottom of the cup, tearing the root ball apart in the process. Once cut, the thick cardboard rim must be torn away or buried at least one inch below the surface, or it acts as a wick that pulls soil moisture up into the air and dries out the roots.
Newspaper pots offer more flexibility. When moving to the field, you have two choices depending on soil warmth and moisture:
- Direct burial: If the paper is thoroughly moist and your garden soil is warm (above sixty-two degrees Fahrenheit), you can plant the entire pot intact. Peel open the bottom folds so the taproot has an unobstructed path down, and bury the pot deep enough that the top paper rim is completely covered by soil.
- Unwrapping: If your soil is cold, heavy with clay, or on the dry side, simply unroll the paper seam and slip the cylinder away like a wrapper. Because the root ball has filled the soil column, the soil holds its shape and slides into the planting hole with zero root disturbance.
In our field test, pots buried in early May were excavated six weeks later to check paper breakdown. The egg carton bottoms, buried beneath two inches of amended loam, were still forty percent intact, resembling thick wet rags that forced lateral roots to grow around them. The three-ply newspaper pots had decomposed almost entirely, leaving behind only faint grey fibers and earthworm castings, with root systems spreading twenty inches outward in all directions.
Which seeds benefit most from deeper rolled cups
Neither container fits every vegetable, and matching the container to the plant's root habit saves time and space under lights. Starting tiny, slow-growing seeds in tall newspaper pots wastes soil and shelf space. Starting vigorous taproot plants in shallow egg cartons guarantees stunted plants.
Egg cartons work acceptably for short-turnaround greens that spend less than twelve days indoors before moving outside. These plants develop shallow, fibrous roots that do not mind tight quarters for a brief window:
- Cut-and-come-again lettuce: Varieties like Black Seeded Simpson germinate rapidly and can be planted outdoors as multi-plant clusters before deep taproots form.
- Arugula and tatsoi: Fast-maturing brassica greens that spend only seven to ten days under lights.
- Sweet alyssum and dwarf marigolds: Small annual flowers grown for beneficial insect borders.
Hand-rolled newspaper pots are far superior for larger vegetables that spend between three and six weeks indoors and resent root disruption:
- Sweet peas and edible peas: Peas demand immediate vertical root depth. A three-and-a-half-inch paper pot lets them develop strong lateral anchors before they head into cool spring soil.
- Tomatoes and peppers: These heavy feeders need room for a root system that can support multiple sets of true leaves before hardening off. Deep paper cylinders also allow you to bury leggy tomato stems right up to their lowest leaves.
- Cucumbers, winter squash, and melons: Cucurbits dislike having their roots handled. Sowing them directly into rolled newspaper allows you to unwrap the base gently or bury the pot whole, keeping the root ball undisturbed.
Common mistakes
Gardeners running these setups for the first time usually run into three recurring errors that undermine their seed starts.
First, leaving the top rim of either container exposed above the garden soil line. Any paper edge sticking up into the wind acts like a kerosene wick, pulling water out of the root zone and evaporating it into the air. Even a quarter-inch of exposed carton rim can dry out a seedling during a warm afternoon. Always tear off the dry top edge or bury it under half an inch of clean compost.
Second, using colorful Sunday comic sections or high-gloss circulars. Standard black ink newsprint uses vegetable oil binders that soil bacteria break down easily. Coated papers contain mineral pigments, synthetic coatings, and water-repellent polymers that take months to decompose and restrict water flow through the pot walls.
Third, packing soil too tightly into the newspaper cylinder. Because paper lacks the rigid structure of plastic, people often jam seed mix down with their thumbs, compressing the medium into a dense brick. Seedling roots need porous soil filled with microscopic air pockets. Fill the pots by tapping the base lightly against the counter, then settle the mix with a gentle spray of water rather than pressing it down with force.
Practical next steps
If you are planning your seed-starting schedule this week, separate your seeds into shallow starters and deep rooters. Reserve your egg cartons for quick-turn microgreens, radishes, and cut salad greens that you plan to harvest small or move outside within two weeks of sprouting.
For your summer nightshades, vines, and sweet peas, spend an evening rolling thirty or forty newspaper cups using a small bottle and broadsheet paper. Store the finished, empty cups in a shoe box until planting day so they stay dry and keep their shape. When filling them, group them closely inside a standard waterproof nursery flat or deep baking tray so their paper walls support each other. If you have questions about specific soil contaminants or local compost safety guidelines, consulting your regional university agricultural extension office will give you testing protocols specific to your local soil.