
Accidents in the laundry room happen to almost everyone who wears knitwear. A hot wash cycle or an overly enthusiastic tumble dryer turns an oversized lambswool pullover into something sized for a teddy bear. Rather than tossing the ruined garment into the scrap bin, you can take advantage of the dense, windproof structure that wool creates when its microscopic scales lock together. A shrunken sweater is already halfway to becoming a sturdy pair of winter mittens.
Felted wool, often called boiled wool or fullered cloth, does not fray when cut. That quality alone makes it far easier to handle than woven fabric or raw knits. By tracing your hand, cutting clean pattern pieces, and choosing the right seaming method, you can turn one medium-sized women's or men's jumper into two or even three pairs of mittens. Here is how to assess your wool, complete the felting process safely, and assemble a pair that will keep your fingers warm in wet snow.
Checking fiber content for felting suitability
Before you run an old sweater through a hot wash, read the care label carefully. True felting happens only with animal fibers because their microscopic structure features overlapping cuticle scales that catch on one another when exposed to heat, water, and mechanical friction. Plant fibers like cotton and synthetic polymers like acrylic do not possess these scales, meaning they will stretch or limp out rather than knit tighter.
Look for garments made entirely of animal fleece, or blends that contain at least 75 percent animal fiber. Standard sheep wool, lambswool, and Shetland wool felt reliably and produce a firm, thick fabric. Luxury fibers such as cashmere, alpaca, and angora also felt, though they tend to produce a softer, fuzzier surface that is slightly less wind-resistant unless blended with sturdier wool. Be cautious with labels marked "superwash" or "machine washable wool." These yarns have been chemically coated or stripped of their scales to prevent felting in domestic laundry, so they will stubbornly retain their knit structure no matter how roughly you treat them.
| Fiber Type | Felting Ability | Resulting Fabric Quality |
|---|---|---|
| Pure Sheep Wool (non-superwash) | High | Dense, rigid, highly windproof |
| Lambswool | High | Soft, thick, excellent stitch coverage |
| Cashmere | Moderate to High | Plush, very warm, lower abrasion resistance |
| Superwash Wool | None to Negligible | Remains open knit, stitches will unravel if cut |
| Wool / Acrylic Blend (over 30 percent acrylic) | Low | Incomplete shrinkage, raw edges may fray |
If the label is missing, perform a quick burn test on a loose thread pulled from an interior seam. Snip a half-inch strand with scissors and hold it in metal tweezers over a heatproof dish. Touch a match flame to the fiber. Animal hair burns slowly with a faint sizzle, smells distinctly like burning hair, and leaves a dark, crumbly ash that crushes easily between your fingers. If the strand melts into a hard plastic bead or smells like sweet celery, synthetic fibers dominate, and the sweater will not felt properly.
Shrinking your wool through thermal agitation
If your sweater has only started to shrink, or if you picked up an unwashed thrift store jumper for this project, you must complete the fulling process before cutting. Fulling requires three elements: hot water to open the hair cuticles, soap to act as a lubricant so the fibers slide together, and friction to knot them permanently.
Place the sweater inside a washing machine along with a pair of sturdy canvas sneakers or two heavy bath towels. The extra items provide mechanical friction by thumping against the knit during the cycle. Add a small tablespoon of standard laundry detergent or dish soap to raise the water pH slightly, which encourages the scales to lift. Set the wash cycle to heavy duty with hot water (around 130 to 140 degrees Fahrenheit) and a cold rinse cycle. The sudden shock from hot wash water to cold rinse water encourages the fibers to contract rapidly.
Once the cycle finishes, inspect the knit structure. You should no longer see distinct, open loops or spaces between stitches. The fabric surface should appear cloudy, uniform, and slightly pebbled. If the fabric still pulls open when stretched horizontally, run it through the same wash cycle a second time, or transfer it wet into a clothes dryer on high heat for 35 to 45 minutes. Remove the piece periodically to monitor the density. You want a thickness around 2 to 3 millimeters. Over-felting can turn a sweater into cardboard that resists bending, which makes sewing difficult.
Lay the damp sweater flat on an old towel to dry. Smooth out any heavy wrinkles or deep folds across the body and sleeves with your palms. Do not hang it on a line, as the weight of the wet wool will stretch the chest section out of true and distort the grainline you need for pattern cutting.
Drafting a mitten pattern from your own hand
A custom mitten pattern requires three flat pieces: the back of the hand, the lower palm with the thumb base, and the upper palm with the inner thumb. This three-piece construction allows your thumb to rest naturally forward instead of being splayed flat out to the side, which improves comfort when gripping bicycle handlebars or snow shovels.
Place a clean sheet of heavy cardstock or kraft paper on a flat table. Lay your non-dominant hand flat on the paper with fingers together and your thumb held slightly away, roughly at a 30-degree angle from your index finger. Using a pencil held straight up and down, trace the entire outer perimeter of your hand, starting at the wrist bone, rounding over your fingertips, tracking down into the thumb crotch, tracing around the thumb, and finishing down the outer wrist.
Add ease and seam allowance to this tracing to create your three pattern pieces:
- Back piece: Measure 0.5 inches outwards from your finger and wrist outline all the way around, ignoring the thumb cutout entirely. Curve smoothly across the outer wrist where the thumb would normally sit. This forms a continuous, rounded mitten shape for the back of the hand.
- Lower palm piece: Trace the lower half of your original outline from the wrist up to the thumb tip, including the thumb outline itself. Draw a straight, horizontal cutting line across the palm from the thumb crotch to the outer edge of your hand. Add 0.5 inches of seam allowance along this cut line and around all outer edges.
- Upper palm piece: Trace the finger section from the thumb crotch upwards to the fingertip arc. Draw a matching thumb extension that mirrors the inner thumb of the lower palm piece. Add 0.5 inches of seam allowance to the thumb seam and outer edges.
Cut your paper templates out cleanly. Before laying them on your wool, test the fit by taping the paper pieces together along the seam lines with masking tape and slipping your hand inside. Make sure your fingertips do not press tightly against the top edge. Felted wool has far less stretch than raw knitwear, so an extra quarter-inch of ease inside the body is essential for trapping warm air.
Cutting sections around ribbing and cuffs
A standard sweater provides distinct zones of texture. The body consists of flat jersey or stockinette, while the hem, sleeve cuffs, and neckline feature ribbing. The ribbed bottom hem of the sweater is the most valuable real estate for mitten makers because it already provides a finished, elasticized cuff that hugs your wrist without requiring added elastic.
Smooth out the dry sweater on a clean cutting mat. Look closely at the ribs along the bottom hem. Align the bottom edges of your paper pattern pieces flush against the sweater hem so that the existing ribbing forms the lower 2 to 3 inches of the mitten. If the sweater's bottom hem is too stretched out to grip your wrist, use the sleeve cuffs instead, which are usually narrower and maintain better elastic recovery after washing.
Follow these practical cutting steps:
- Pin the paper pattern pieces to the wool using long, pearl-headed dressmaker pins, placing pins every 2 inches along the perimeter.
- Make sure you cut mirror images for the left and right hands. Flip the paper pattern over face-down before cutting the second pair of pieces to avoid ending up with two left mittens.
- Use sharp fabric shears or a 45 mm rotary cutter. Dull blades will push the dense wool fibers rather than slice them, creating jagged edges that complicate seam alignment.
- Cut directly along the edge of the pattern paper with smooth, long strokes. Keep your free hand pressed flat beside the blade to prevent the thick cloth from shifting.
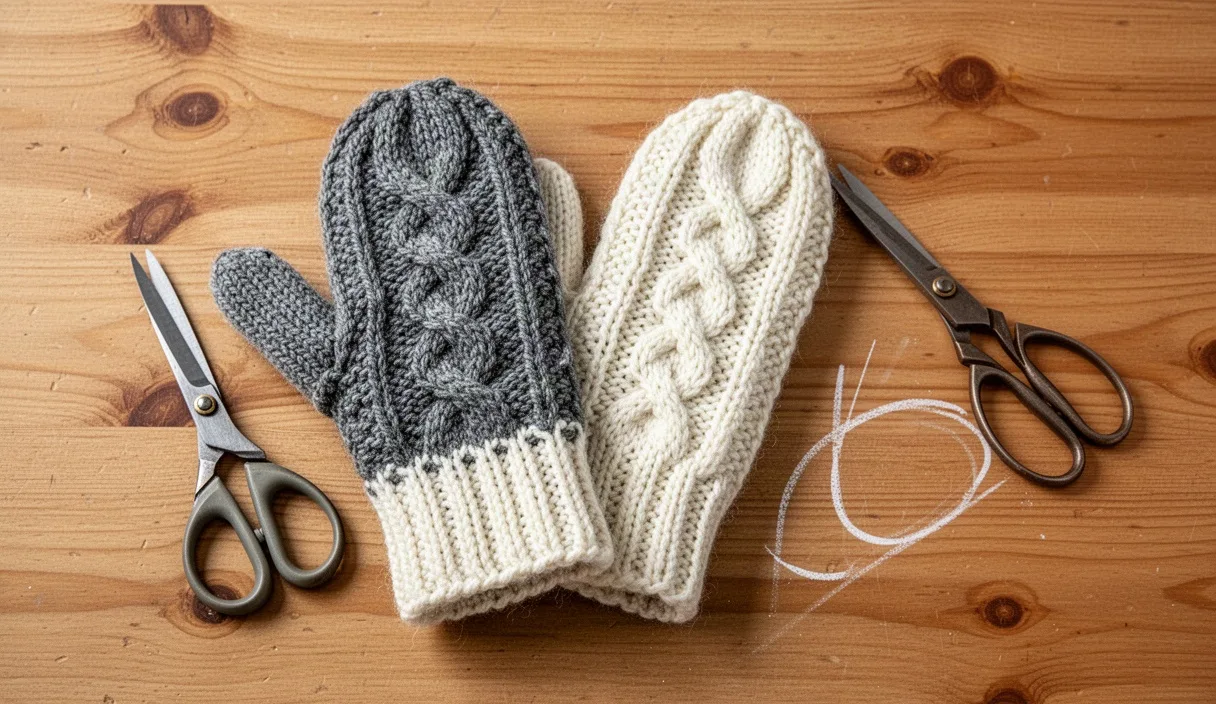
If your sweater has elbow patches, cable braids, or a fair isle pattern, plan your cuts deliberately. Placing a cable down the center of the hand back adds structural warmth and decorative interest. Avoid placing thick cables directly across the palm piece, as hard ridges can cause blister points during manual work.
Seaming techniques for dense wool without bulk
Because boiled wool does not unravel, standard fabric construction rules change. Traditional enclosed seams like French seams create four to six layers of wool at the joints, resulting in stiff, ropelike ridges that press painfully into your fingers. You need techniques that join the pieces securely while keeping the interior smooth.
If sewing on a household sewing machine, use a ballpoint or heavy-duty denim needle (size 90/14 or 100/16) and a strong all-purpose polyester thread. Cotton thread can snap under the tension of thick winter fabrics. Set your machine to a wide, open zigzag stitch or an overcast stitch with a length of 2.5 mm and a width of 3.5 mm. Sew your seams with a 0.25-inch allowance, then trim away the excess seam allowance immediately next to the stitching. The open zigzag allows the seam to stretch when you push your hand into the cuff.
Hand-sewing is often more controllable than machine sewing on heavy wool, and it produces virtually zero ridge along the fingers. Two hand stitches work particularly well:
- The Flat Lapped Seam: Overlap the cut edge of one piece over the other by 0.25 inches. Secure them with a small cross-stitch or catch stitch down the center. This completely eliminates internal seam ridges, making it ideal for the thumb assembly.
- The Hand Blanket Stitch: Hold the wrong sides together and sew along the exterior raw edges using heavy buttonhole twist thread or two strands of crewel wool. Space stitches approximately 0.2 inches apart. This leaves the inside of the mitten entirely smooth against your skin.
Assemble the pieces in an orderly sequence. First, join the inner thumb seam of the upper palm piece to the lower palm piece. Next, fold the thumb along its centerline and sew down the outer thumb seam to the crotch. Finally, place the assembled palm piece against the back hand piece, pin thoroughly through the thumb valley to prevent shifting, and stitch the outer perimeter from the wrist cuff all the way around to the opposite wrist edge.
Common mistakes to avoid
Even seasoned crafters run into surprises when working with recycled wool. Watching out for a few frequent pitfalls will save both time and raw material.
- Felting a sweater that has dry-rot or moth damage: Agitation accelerates deterioration. Inspect the sweater under good lighting before washing. Small moth pinholes will tear into gaping chasms once subjected to a heavy wash cycle.
- Forgetting pattern orientation: Cutting two identical palm sections results in two mittens for the same hand. Always flip the paper pattern piece face down for the second mitten.
- Trimming seam allowances too close to the thread: While felted wool is stable, an allowance narrower than an eighth of an inch can pull out under tension when pulling damp mittens off tight hands.
- Using standard fine sewing pins: Thin silk pins bend easily against thick boiled wool and vanish into the pile. Use long, heavy quilting pins with large colored heads.
Next steps for your finished mittens
Once your mittens are fully assembled, turn them right side out and try them on. If any spot along the finger curve feels snug, dampen the mittens with warm water, pull them onto your hands, and flex your fingers repeatedly to mold the damp wool to your specific knuckle shape. Take them off and let them dry on a towel away from direct heat sources.
To prepare your workspace for another run, shake the wool lint from your cutting mat and brush off the feed dogs of your sewing machine, as fullered knitwear produces significant fiber dust during cutting. If you have wool cuffs or chest panels left over, store them in a sealed breathable box with cedar blocks to protect them from moths until your next mending afternoon. A single adult sweater usually yields enough spare scraps for a matching pair of child-sized mittens or a pocket warmer pouch.