
Denim tears rarely happen in convenient places. They show up at the flex point of a knee, along the edge of a back pocket, or right through the seat where the fabric absorbs friction every day. Tossing a worn pair into the rag bin feels wasteful, but a quick iron-on patch usually turns stiff and peels off after two cycles in the laundry. Sashiko, a Japanese hand-stitching method developed out of necessity by rural workers centuries ago, solves this problem by pairing structural reinforcement with flexible cotton thread.
Rather than hiding the repair, Sashiko uses repetitive geometric stitches to secure a stabilizing fabric patch behind the rip. The technique locks loose warp and weft fibers into place while preserving the natural drape and movement of your jeans. With a dedicated sashiko needle, heavy cotton thread, and an afternoon of focused work, you can turn a structural blowout into the strongest part of your favorite pants.
Choosing your backing patch fabric
The backing fabric bears the mechanical load once your repair is complete. If you choose a fabric that is too light, the stitching will pull through under stress. If you choose one that is too thick, the patched area will feel like cardboard against your skin and cause new tears along the perimeter of the mend. The goal is to match the weight and grain movement of the surrounding denim as closely as possible without doubling the thickness of the garment.
A mid-weight cotton twill, chambray, or a section of worn cotton denim ranging between 7 ounces and 10 ounces per square yard works best for standard 12-ounce to 14-ounce jeans. Avoid modern synthetic blends or stretch denim containing elastane for your backing patch unless the jeans themselves have significant stretch. Pairing non-stretch sashiko thread with stretchy backing fabric creates puckering and broken stitches after you sit down a few times.
Always wash and pre-shrink both the backing fabric and the jeans before cutting anything. Cotton twill can shrink between 3 percent and 6 percent on its first hot water wash, which will warp your decorative grid if you sew it into raw jeans unwashed. Cut your patch so it extends at least 25 millimeters beyond the thinned or torn area on every side. Structural denim failure usually extends beyond the visible hole into fabric that looks intact but has lost half its yarn thickness.
| Fabric Type | Fabric Weight | Flexibility | Ideal Placement |
|---|---|---|---|
| Worn Denim (Pre-washed) | 8 to 10 oz | Moderate | Seat, crotch blowout, lower thighs |
| Cotton Twill Canvas | 7 to 9 oz | Firm | Knees and workwear stress zones |
| Japanese Tenugui / Cotton Slub | 5 to 6 oz | High | Pocket corners, shins, upper calves |
| Linen-Cotton Blend | 6 to 8 oz | High | Loose-fitting legs and side seams |
Marking your stitching grid without ink stains
Even spacing makes the difference between an intentional Sashiko pattern and a cluster of running stitches that bunch up. Standard ballpoint pens, permanent markers, and gel pens bleed into denim fibers when washed and leave permanent dark shadows under white thread. You need marking tools that sit on the surface fibers and rinse away completely with cold tap water.
A water-soluble tailor pencil or a traditional clay chalk pencil is the most reliable tool for dark indigo denim. Avoid wax-based tailor chalks on jeans, because the heat from an iron or body temperature sets the wax into the denim twill. For pale or stonewashed jeans, blue water-soluble fabric pens provide sharp contrast without bleeding into the white core of the denim yarn. If you prefer no pigment at all, a ceramic tailor marker or a wooden Hera marker uses dull pressure to indent lines into the weave, giving you a visible line of shadow to follow without any residue.
To lay out a balanced grid, use an acrylic ruler with millimeter marks. Lay the leg flat on a cutting mat or wooden table. Trace your primary axis along the straight grain of the denim, which runs parallel to the outer seam. Mark parallel guidelines spaced 5 millimeters or 7 millimeters apart across the repair area. Then mark perpendicular lines at the same spacing to create a clean square grid. For diamond or cross-stitch variations, angle your ruler at 45 degrees across the intersections.
- Clay-based chalk: Best for raw, dark, or unwashed indigo; brushes away dry or washes out cleanly in warm water.
- Water-soluble ink pen: Ideal for faded, acid-wash, or light indigo; requires a gentle water rinse to dissolve.
- Hera marker: Creates non-pigmented crease lines on medium to heavy denim; excellent for straight vertical or horizontal passes.
- Masking tape striping: Low-tack painters tape set down in 5-millimeter gaps gives an edge to stitch against without pencil marks.
Securing raw denim edges before sewing
A torn knee or blown pocket will unravel further if the frayed edges are trapped under uneven thread tension. Before you pin the patch in place, turn the jeans inside out and inspect the perimeter of the tear. Snip away long, loose weft threads that hang down like fringe, but leave short, fuzzy fibers intact to help lock the backing fabric against the hole. Do not cut away any stable blue warp yarn, even if it looks ragged.
Turn the jeans right side out and slide your pre-cut backing patch behind the hole. If you are working on a pant leg, insert a rolled wooden rolling pin, a magazine wrapped in plastic wrap, or a tailor ham into the leg. This prevents you from accidentally catching the back of the pant leg with your needle while stitching through the front.
Hold the backing patch securely against the inside surface. While quilters often rely on safety pins, straight pins tend to distort heavy denim and catch your thread as you make long running passes. Instead, thread a standard domestic sewing needle with thin, contrasting thread and sew large, loose basting stitches in an X-pattern through the center of the patch and along all four edges. Keep the fabric smooth and flat as you baste. Alternatively, dab small dots of water-soluble fabric glue stick around the border of the patch, press firmly for 30 seconds, and let it dry. The glue will keep the layers aligned while you work and rinse out in the first wash.
Stitching patterns that hold under tension
Traditional Sashiko uses a specialized long needle with an elongated eye and a non-divisible, matte cotton thread. Do not use regular sewing machine thread or standard six-strand embroidery floss; machine thread lacks the strength to bear daily wear, while embroidery floss separates, catches on rough denim edges, and shreds. Sashiko thread comes in fine, medium, and heavy weights. A medium 20/4 or 20/6 weight provides the best balance between tensile hold and smooth passage through thick denim.
Load your needle with a thread length no longer than 45 centimeters to avoid tangles and thread abrasion. Use a palm thimble (a ring worn around the middle finger with a metal dish resting against the lower joint) to drive the needle through multiple layers of fabric. Rather than poking the needle up and down one stitch at a time, load three to six stitches onto the needle in an accordion fold, then draw the thread through in one controlled movement.
Functional stitch geometry
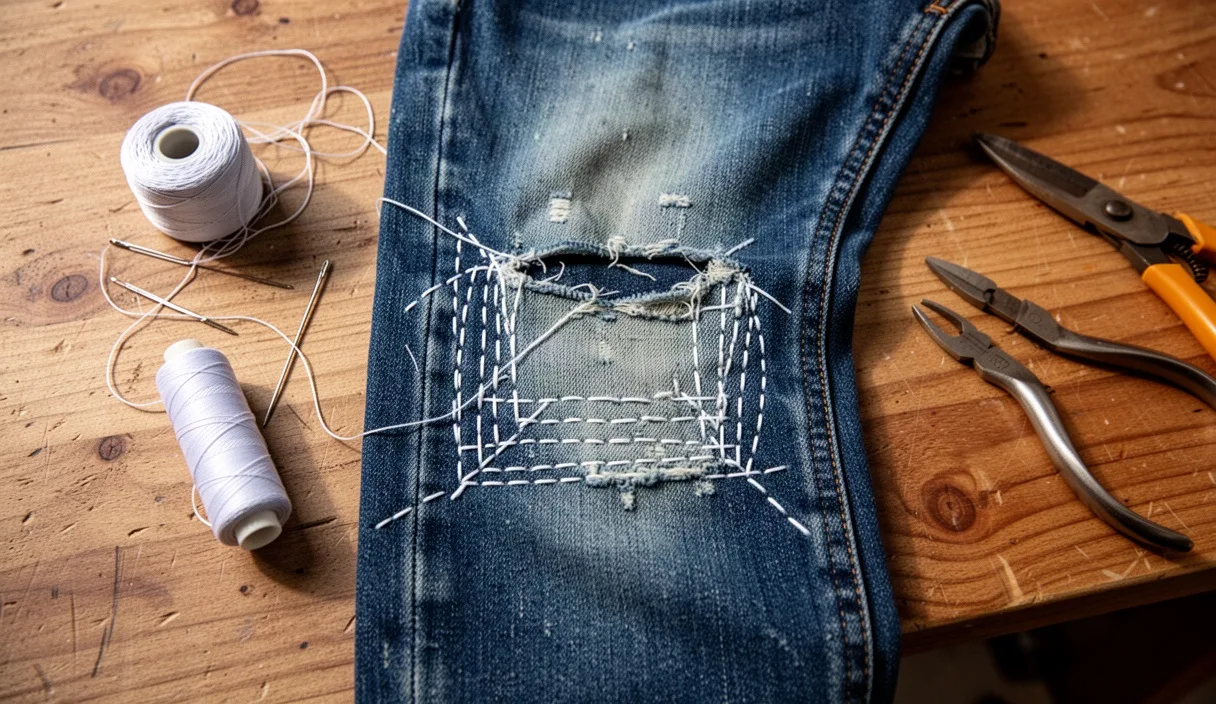
Different areas of a pair of jeans require different stitch densities. For a thigh or lower leg, simple parallel lines of running stitches (Moyozashi) work well. For high-friction points like the crotch or knees, use an interlocking grid (Hitomezashi) where stitches meet or cross at right angles. This creates a woven mesh that distributes pulling forces evenly across both axes of the fabric.
- Horizontal baseline pass: Stitch across the entire grid from right to left (or left to right if left-handed), creating lines where the exposed stitch on top is slightly longer than the gap underneath. Aim for a 3-to-2 ratio: 3 millimeters of thread visible on the outside, 2 millimeters tucked behind the patch.
- Vertical locking pass: Turn the leg 90 degrees and stitch the vertical lines through the intersections. If you are doing Jujizashi (cross stitch), ensure your vertical stitches meet the center of each horizontal stitch without splitting the thread plies.
- Diagonal reinforcement: On knees that undergo constant bending, add a single diagonal pass running from the lower outer seam toward the upper inner seam. This counters the rotational torque created when you sit or squat.
- Tension release at the turns: When reaching the end of a row, leave a small, loose loop of thread on the underside before pivoting into the next row. This small loop gives the denim room to stretch when you bend your knee, preventing the stitches from puckering the fabric.
Edge finishing at the tear
When stitching across the open hole where the raw patch is visible, keep stitch lengths consistent. As your needle crosses the frayed edge from the original denim to the patch, place a stitch directly across the boundary line. This anchors the torn rim down against the backing fabric, preventing the rip from curling or catching on keys, buttons, or toes when putting the jeans on.
Washing and caring for mended denim
Hand-stitched denim repairs settle and gain strength after their initial wash. As water hits the cotton sashiko thread, the fibers swell slightly, settling firmly into the gaps in the denim weave. This natural locking process anchors the repair, but rough washing cycles can snap exposed surface stitches if you are careless.
Turn the jeans inside out before washing to protect the decorative surface from rubbing against the drum of your washing machine. Wash them on a gentle or normal cycle using cold water (no higher than 30 degrees Celsius) and a mild liquid detergent. Avoid laundry detergents containing optical brighteners or bleach, which degrade natural indigo dye and weaken cotton sashiko thread over time. Washing in cold water also keeps your backing patch and jeans from shrinking at different rates.
Air drying is the safest method for mended jeans. Hang them by the cuffs or waist away from direct sunlight. If you must use a clothes dryer, select a low-heat setting and remove the jeans while they are still slightly damp to finish air-drying flat. High heat bakes the cotton thread, making it brittle, and shrinks the backing fabric faster than the worn outer denim, causing puckering along the edges of your grid.
Common mistakes
Even with careful preparation, small mistakes can compromise the durability of a Sashiko mend. Watch for these structural issues before you finish your repair:
- Pulling thread tension too tight: Gathering the thread like a drawstring causes the denim to bubble. Your patch should lay flat as you work; if it bows upward, pull gently on the sides of the fabric to draw out extra slack before knotting off.
- Making the backing patch too small: Stopping the patch right at the margin of the tear guarantees a new tear within weeks. Always overlap solid, unfrayed denim by at least 25 millimeters.
- Using standard multi-strand embroidery floss: Embroidery thread splits and abrades quickly under friction. Use genuine single-strand sashiko thread or heavy topstitching thread.
- Skipping the basting step: Relying solely on your hands to hold the patch in place causes the backing to shift out of alignment, resulting in permanent twists down the pant leg.
- Knots placed directly under stress points: Avoid ending a thread run inside the thinnest part of the knee. Finish your thread on the thicker perimeter of the patch using several small backstitches on the reverse side rather than a large, lumpy knot.
Practical next steps
To begin repairing your denim, inspect the damaged area and test the surrounding fabric by pulling it between your thumbs. If the threads separate easily, mark a wider repair boundary than the hole itself. Gather your supplies: a package of assorted sashiko needles, a skein of unmercerized size 20/4 or 20/6 sashiko thread, a piece of pre-washed cotton twill or denim, a water-soluble marking pencil, and a clear ruler.
If you are working on an intricate crotch blowout with complicated curved seams, consider practicing on an old pair of denim cutoffs or an old work shirt first. For tears running directly through heavy flat-felled structural seams, check whether your home sewing machine can handle the bulk or consult a professional tailor to rebuild the main seam before you apply decorative Sashiko reinforcement to the surrounding panels.