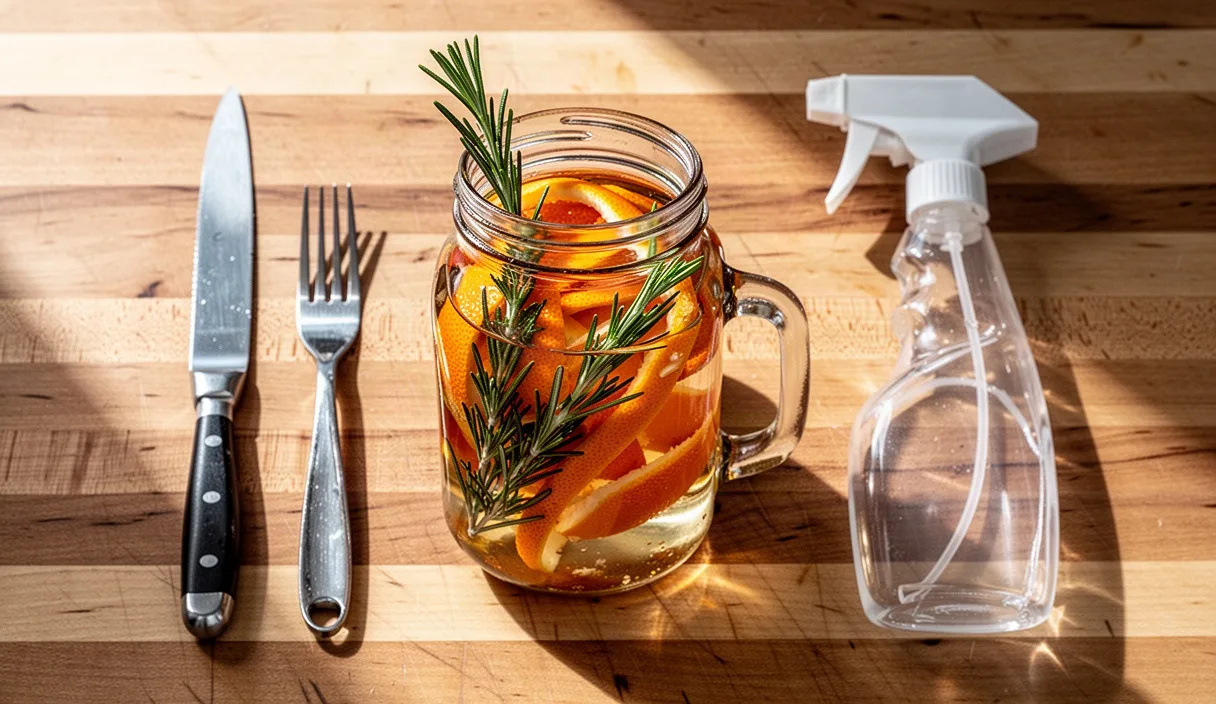

A cutting board covered in lemon rinds, grapefruit halves, and bare thyme stems looks like compost in the making, but those scraps still hold useful plant chemistry. Citrus skins are packed with d-limonene, an organic compound that acts as a natural solvent and degreaser. Woody herb trimmings, such as rosemary and lavender, contain aromatic terpenes like pinene and camphor that lend a clean scent and help dissolve light kitchen residues. By capturing these volatile compounds in everyday distilled white vinegar, you create a surface spray that cuts through grime without paying for commercial scented sprays.
Making your own infused vinegar spray is a low-effort project that fits into everyday cooking routines. Instead of throwing away thick grapefruit skins or tossing mint stalks, you collect them in a jar on the counter. The resulting infusion will not sterilize an operating room, and it should never replace proper sanitizers in critical hygiene situations, but it handles daily dust, grease splatters, and soap scum with minimal fuss. Here is how to turn kitchen leftovers into reliable cleaning solutions that work across the house.
Suitable peels and herbs for natural cleaning
Not every piece of vegetable waste belongs in a cleaning jar. The goal is to extract active solvent oils and pleasant fragrances, which means focusing on citrus fruits and woody herbs. Citrus fruits contain the highest concentration of cleaning compounds in their zest, specifically the colored exterior skin rather than the spongy white pith beneath. Woody herbs provide high levels of thymol, carvacrol, and cineole, which give the infusion an herbal note that balances the sharp tang of the acetic acid.
You can mix and match materials depending on what you cook with during the week. Orange peels produce a warm, sweet scent and pack heavy degreasing power, making them ideal for stovetops. Lemons and limes yield a sharper scent that works well in bathrooms to neutralize hard water smells. Grapefruit offers a slightly bitter, clean aroma and large yields of peel per fruit. For herbs, stick to varieties with tough, woody stems that maintain their structural integrity in acid rather than delicate leafy greens that turn to mush.
| Botanical Material | Primary Active Compound | Best Kitchen or Room Application |
|---|---|---|
| Orange and tangerine peel | d-Limonene | Greasy stovetops, range hoods, microwave interiors |
| Lemon and lime peel | Citric acid residue, limonene | Bathroom sinks, chrome faucets, glass shower doors |
| Grapefruit peel | Nootkatone, limonene | Trash can interiors, mudroom surfaces, floor mopping |
| Rosemary and thyme stems | Camphor, cineole, thymol | Fridge shelves, cutting board prep tables, garbage disposals |
| Sage and lavender sprigs | Linalool, camphor | Bedroom dust sprays, entryway tables, laundry room folding surfaces |
Soft herbs like basil, cilantro, parsley, and dill should stay out of your cleaning jar. Their thin leaves break down rapidly into an unappealing brown sludge that clouds the liquid, smells like decaying salad, and clogs spray bottle nozzles within days. Stick to fibrous stems and firm rinds to keep the liquid clean and stable.
Rinsing and drying scraps to prevent mould
The primary enemy of a homemade cleaner is mold. Commercial citrus is frequently treated with post-harvest fungicides or edible wax coatings that keep fruit fresh on store shelves. While standard white vinegar contains about 5 percent acetic acid, which suppresses most microbial growth, introducing dirty rinds, excessive water, or sugary juice pockets can cause white or blue mold rafts to form on the liquid surface before the acid takes over.
Before saving peels, wash the whole fruit under warm running water while scrubbing the skin with a stiff vegetable brush. This removes surface dirt, residual wax, and airborne spores. When preparing the fruit for cooking or snacking, separate as much of the soft, wet pulp as possible from the skin. Juice contains natural sugars that can make your finished cleaning spray sticky on glass surfaces and invite bacterial growth during the steeping period.
Follow this preparation sequence whenever you process kitchen trimmings for a batch:
- Scrape out remaining fruit pulp from the rinds using the edge of a spoon.
- Snip herb stems into lengths of 5 to 8 centimetres so they pack tightly into jars without springing out.
- Lay cleaned peels and stems on a clean dish towel or paper towel for 3 to 4 hours to let surface moisture evaporate.
- If you do not have enough peels to fill a jar in one day, store the dried scraps in a sealed freezer bag in your freezer until you collect enough volume.
Freezing your trimmings offers an added benefit beyond storage convenience. As water inside the plant tissues freezes, ice crystals expand and puncture the plant cell walls. When you eventually submerge the frozen peels in room-temperature vinegar, the ruptured cell walls release their aromatic oils and solvents into the liquid much faster than fresh, unbroken rinds would allow.
The steeping timeline and storage conditions
Infusing cleaning vinegar is a slow, passive extraction process. You will need standard distilled white vinegar with an acidity rating between 5 and 6 percent. Do not waste money on apple cider vinegar, wine vinegar, or cleaning vinegars with higher concentrations for this stage; wine vinegars contain residual sugars that leave sticky streaks, while high-strength cleaning vinegar can corrode glass seal liners over weeks of steeping.
Place your prepared scraps into a clean glass jar, such as a 1-litre wide-mouth canning jar. Pack the rinds and stems loosely until the jar is roughly three-quarters full. Pour the white vinegar directly over the scraps until they are submerged by at least 2 centimetres of liquid. Any peel protruding above the waterline can develop mold from contact with trapped air pockets. If the scraps float, weigh them down with a small glass fermentation weight or a clean ceramic saucer that fits inside the jar rim.
Secure the jar with a plastic lid rather than a traditional metal canning ring and disc. Vinegar fumes attack tin-plated steel, causing the lid to rust within a week and dropping orange iron flakes directly into your cleaner. If you only have metal lids, place a sheet of parchment paper or plastic wrap over the jar opening before screwing the band into place.
Store the steeping jar in a dark, temperature-stable location like a kitchen pantry, a under-sink cabinet, or a basement closet. Keep the ambient temperature between 18 and 24 degrees Celsius. Avoid window sills or shelves adjacent to ovens, as direct sunlight and erratic heat degrade the delicate botanical compounds, turning the liquid a dull brownish-grey. Let the mixture steep for a minimum of 14 days and a maximum of 28 days. By the end of the third week, the vinegar will turn a bright gold or pale orange, and the pungent vinegar sharpness will soften beneath strong citrus and pine notes.
Straining, dilution ratios, and spray bottle selection
Once the steeping period wraps up, you must remove every trace of solid material to prevent the liquid from clouding or rotting down the road. Set a fine-mesh stainless steel strainer over a clean glass bowl. Line the mesh with a layer of unbleached cheesecloth or a standard paper coffee filter. Pour the jar contents through the setup, letting the liquid drain entirely by gravity. Do not press hard on the soggy rinds with a spoon; mashing them forces cloudy pectin and dissolved pulpy solids into the clean liquid.
Your finished infusion is a concentrated base. Using it straight from the jar is needlessly strong for routine dusting and can leave a light scent film on shiny fixtures. Mix your final cleaner using simple dilutions based on the tasks you tackle:
- All-purpose maintenance spray: Combine 1 part infused vinegar with 1 part distilled water. This handles counter cleanups, fingerprints on appliances, and tile wipe-downs.
- Heavy degreaser: Combine 2 parts infused vinegar with 1 part distilled water, adding 1 drop of liquid castile soap or plain dishwashing liquid. Shake gently before use on greasy stove tops and baking sheets.
- Glass and polished chrome spray: Combine 1 part infused vinegar with 2 parts distilled water. The lighter concentration prevents hazing on mirrors and window panes.
Always use distilled or demineralized water for diluting your concentrates. Tap water contains dissolved minerals, such as calcium, iron, and magnesium, which react with vinegar over time, cloud the mixture, and leave cloudy drying rings on clear glass.
Pour your diluted solution into an appropriate spray bottle. High-density polyethylene, labeled as HDPE with recycling number 2, or amber glass bottles work best. Acetic acid gradually breaks down cheap plastics made from low-grade PET, causing spray triggers to stick, leak, or crack around the screw collar. If you use a glass bottle, select one with a silicone protective boot on the base so an accidental bump against a porcelain sink does not shatter the container. Label your bottles with the dilution ratio, the scent blend, and the creation date.
Surfaces to clean and surfaces to avoid
Vinegar-based sprays are acidic tools, which makes them effective against alkaline soils like limescale, hard water spots, and dried soap scum. However, that same acidity means they can damage sensitive domestic finishes. Knowing where to use your citrus cleaner is the difference between an easy afternoon chore and an expensive home repair.
Acid breaks down the calcium carbonate present in natural stones. Never use this spray on marble, travertine, limestone, or slate. Even a brief misting can cause chemical etching, which shows up as dull, cloudy rings that require mechanical re-polishing by a stone restoration specialist to remove. Engineered quartz and certain granite varieties sealed with synthetic resins tolerate occasional acidic sprays, but continuous exposure breaks down the protective sealants over months. When dealing with luxury stone surfaces, set the vinegar aside and use warm water with a dedicated pH-neutral stone wash.
| Surface Type | Safety Status | Application Instructions and Notes |
|---|---|---|
| Glazed ceramic and porcelain tile | Safe | Spray directly, let sit for 60 seconds, and wipe clean with microfibre. |
| Stainless steel appliances | Safe | Mist lightly and wipe in the direction of the metal grain to prevent streaks. |
| Laminate and solid surface counters | Safe | Cuts through food residues easily; rinse with a damp cloth afterward. |
| Marble, limestone, and travertine | Unsafe | Do not use. Acid permanently etches natural calcium-based stone. |
| Finished and waxed hardwood floors | Unsafe | Repeated use strips protective polyurethanes and dissolves wax coatings. |
| Electronic screens (phones, TVs) | Unsafe | Acid strips the sensitive anti-glare and oleophobic coatings applied to screens. |
Use caution around rubber washing machine door seals, dishwasher gaskets, and natural rubber hoses. Extended contact with high-acid solutions causes natural rubber to dry out, lose elasticity, and eventually crack. If you use your homemade spray to clean around sink drains, faucet bases, or appliance seals, rinse the area with a wet cloth soaked in clean water to ensure no residual acid sits on the rubber surfaces.
Common mistakes
One frequent mistake is adding fresh lemon juice directly to the vinegar jar alongside the peels. While it seems logical that juice would add cleaning power, juice contains citric acid mixed with fructose and pulp fibers. The sugars leave a tacky, dust-attracting residue across kitchen surfaces, and the raw juice goes stale much faster than distilled vinegar, shortening the shelf life of your spray from 6 months down to a few weeks.
Another error is blending baking soda directly into your vinegar spray bottle. The vigorous bubbling looks satisfying, but the chemical reaction simply converts your active acetic acid and sodium bicarbonate into water, carbon dioxide gas, and sodium acetate. You lose the acidic properties of the vinegar and the mechanical scrubbing grit of the soda. Use them as consecutive tools instead: sprinkle dry baking soda on a greasy sink to scrub away grit, rinse with water, and then mist your citrus spray to polish the surface.
Finally, avoid letting the peels steep for months in the belief that longer wait times yield a stronger cleaner. After roughly 4 weeks, the plant matter begins breaking down structurally. The vinegar extracts bitter tannins and deep pigments that turn the liquid dark brown, which can stain white laminate, light-colored grout, or painted baseboards.
Practical next steps
Start your first batch by setting aside a single, clean 1-litre glass jar in the kitchen with a secure lid. Over the next week, collect the peels from 3 or 4 oranges or lemons, along with any leftover rosemary or thyme sprigs from dinner prep. Trim away loose pulp, let the trimmings air-dry on the counter for an afternoon, and drop them into the jar.
Fill the jar with plain distilled white vinegar, mark the date on the lid with a piece of masking tape, and slide it into a dark cupboard. Set a calendar reminder on your phone for 3 weeks out. While the infusion steeps, track down a durable HDPE or amber glass spray bottle with an adjustable nozzle, and pick up a gallon of distilled water so you are ready to strain, dilute, and clean the moment the timer runs out.