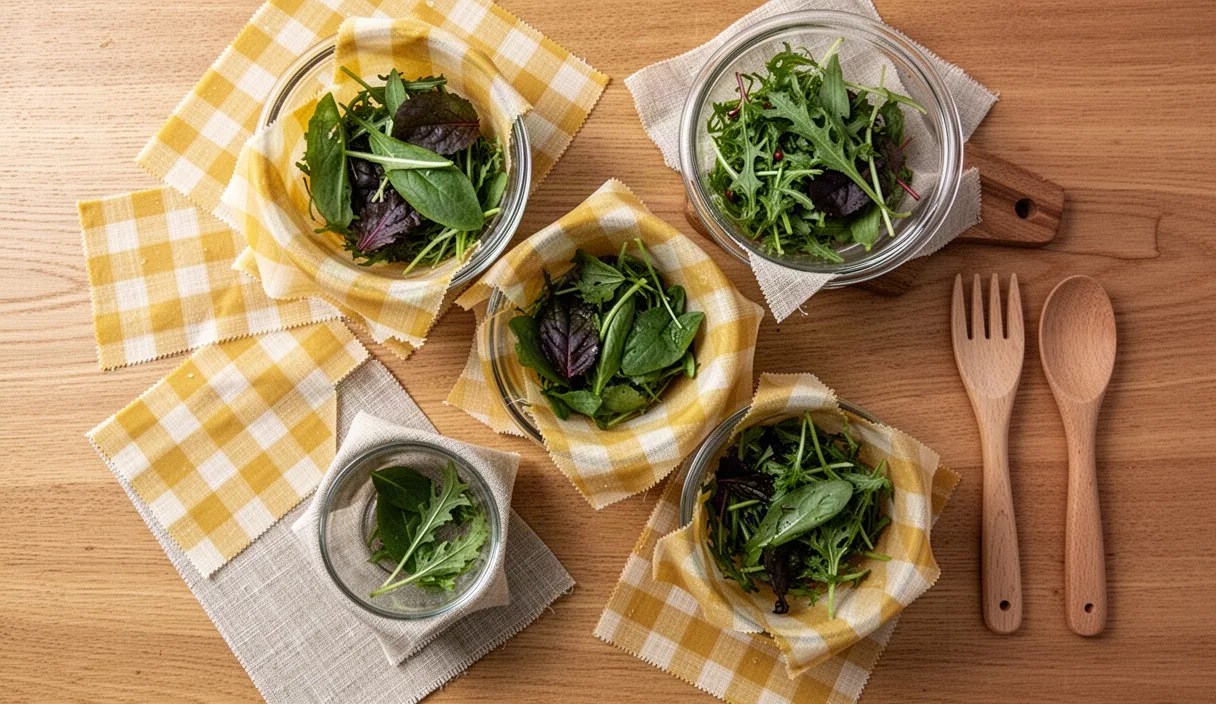

A scrap bag filled with leftover dressmaking linen and worn-out cotton pillowcases usually languishes in the back of a closet until guilt forces a decision. Turning those odd-shaped cuts of breathable woven fiber into food wraps keeps them in active service for years, keeping halved lemons moist, covering fermenting sourdough bowls, and wrapping wedges of cheddar without the condensation sweat that cling film produces.
Making functional wraps at home takes an afternoon, a couple of baking sheets, and three simple raw ingredients. Once you understand how natural waxes and tree resins behave under moderate heat, you can churn out a dozen reusable covers tailored to the exact dimensions of your everyday bakeware and produce bowls.
Why plain beeswax cracks and how resin provides grip
Most beginners start by grating a block of pure yellow beeswax directly onto cloth, ironing it flat, and wondering why their wrap feels like stiff cardboard the next morning. Plain beeswax cools into a crystalline, rigid layer. When you wrap it around a ceramic bowl and pinch the rim, the warmth of your hands softens it slightly, but as soon as the wrap sits in a cold refrigerator, the wax contracts and micro-fractures. The seal fails, the wrap pops open, and the edges shed fine wax dandruff over your food.
To produce a wrap that behaves like cling film, the wax requires two partner ingredients: a plant resin for stickiness and a liquid oil to act as a permanent plasticizer. Pine rosin, also sold as colophony, is the solid amber resin tapped from pine trees. It has natural antimicrobial properties and offers a high friction coefficient. When combined with wax, it provides that quiet grab that allows the cloth to stick to itself and grip smooth glass or ceramic surfaces.
Pure rosin, however, is brittle on its own. Adding jojoba oil solves this. Jojoba is technically a liquid wax ester rather than a true triglyceride oil, which means it resists rancidity over long periods at room temperature. The oil molecules sit between the tight crystalline chains of the beeswax and rosin, preventing them from locking into a rigid matrix. The result is a pliable, leather-like composite that flexes hundreds of times without creasing into white fracture lines.
| Coating Formulation | Flexibility in Refrigerator | Surface Tackiness | Durability Over Time |
|---|---|---|---|
| Pure Beeswax | Brittle; snaps along tight folds | Low; slips off polished ceramic | Flakes off fabric within weeks |
| Wax and Jojoba Oil | Soft; stays pliable when cold | Negligible; will not stick to itself | Washes out slowly; lacks seal |
| Wax, Rosin, and Jojoba | Supple; bends easily at 4 degrees Celsius | High; holds rims firmly with hand warmth | Maintains continuous film for months |
Washing and cutting leftover cotton and linen scraps
Not every fabric remnant makes a dependable wrap. You need medium-weight, natural plant fibers with a plain, balanced weave. Pure linen and light-to-medium cotton lawn, poplin, or quilting cotton work best. Linen has slightly thicker fibers that hold the wax mixture well, producing heavy-duty covers for mixing bowls and bread loaves. Lighter cottons yield supple wraps suited for wrapping small pieces of fruit, cut cucumbers, or sandwiches.
Avoid synthetic textiles completely. Polyester, rayon, and acrylic fibers cannot withstand the baking temperatures required to melt pine rosin, and their smooth, extruded filaments will not absorb the melted wax. The coating simply sits on top of synthetics as a slippery skin and peels away during the first wash. Blended fabrics with even a small synthetic content tend to weep wax when folded.
Before cutting, strip the fabric of all sizing, chemical finishes, and residual laundry softeners:
- Machine wash the scraps on a hot cycle using an unscented, residue-free detergent. Skip all fabric conditioners, which coat fibers with silicone and prevent wax penetration.
- Line dry until bone dry, then press the fabric with a hot steam iron. Pressing flattens the weave and removes wrinkles that would otherwise create uneven wax pools.
- Cut the fabric to size using pinking shears rather than standard scissors. The zigzag edge arrests fraying when the wraps are washed repeatedly in cold water, eliminating the need to hem edges.
Sizing your cuts according to your kitchen habits prevents waste. An 8-by-8-inch square covers half an onion, half an apple, or the top of an open tin. An 11-by-11-inch square handles blocks of cheese, cut melons, and standard cereal bowls. A 14-by-14-inch cut wraps whole artisan sourdough boules, bunches of leafy greens, or large serving platters.
Melting ratios for wax, pine rosin, and jojoba oil
Achieving the right balance between stickiness and pliability comes down to weight, not volume. Always use a digital kitchen scale to measure your ingredients. Pine rosin comes either as translucent amber rocks or pre-crushed powder. If you purchase rock rosin, place it inside a heavy canvas bag and crush it into coarse sand with a mallet before weighing; large chunks take three times as long to dissolve, risking thermal discoloration of the beeswax.
A dependable baseline mixture for balanced kitchen utility uses the following proportions:
- 65 grams beeswax pellets (yellow, unbleached wax imparts a pleasant honey scent and warm tone)
- 23 grams crushed pine rosin
- 12 grams pure cold-pressed jojoba oil
This 100-gram batch will coat roughly four to five medium-sized wraps. If you prefer wraps with an aggressive cling for sealing dry containers, nudge the rosin to 27 grams and decrease the beeswax to 61 grams. If you live in a colder climate where your pantry stays chilly, increase the jojoba oil to 15 grams to keep the cloth pliable.
Melt the mixture using an indirect heat source. Pine rosin and beeswax release flammable vapors if subjected to direct heat, so never use a single saucepan directly on an open flame or electric burner. Dedicate a clean, wide-mouth glass jar or an inexpensive metal pitcher to this project, as cleaning melted rosin from household cookware is a miserable chore. Place the container into a saucepan filled with two inches of gently simmering water over medium-low heat.
Stir the mixture with a wooden skewer or disposable chopstick. Beeswax melts quickly at roughly 63 degrees Celsius, while pine rosin softens more slowly, fully liquefying between 75 and 85 degrees Celsius. Stir continuously until the amber resin solids have dissolved entirely into the golden wax and oil. Once the liquid is clear and homogenous, remove it from the water bath.
Oven sheet baking method for uniform saturation
While many craft tutorials recommend an iron and parchment paper, the oven sheet method is faster, cleaner, and guarantees that the wax penetrates through to the core of every thread. It also leaves your iron clean, which preserves household peace.
Preheat your oven to 85 degrees Celsius (roughly 185 degrees Fahrenheit). If your oven runs hot, use an oven thermometer to verify the temperature; pine rosin begins to smoke if temperatures push past 110 degrees Celsius. Line a large, rimmed aluminum baking sheet with unbleached parchment paper. The parchment can be reused across dozens of batches, so keep it flat.
Laying and brushing
Lay a cut fabric square flat on the parchment paper. If the fabric is larger than your pan, fold it accordion-style; the heat will draw the wax through both layers, though working with a single flat layer is easiest. Using an inexpensive natural-bristle paintbrush, dip into your molten wax blend and paint broad, quick strokes across the surface of the fabric. The liquid will cool into white, cloudy streaks almost instantly upon hitting the cool cloth. That is normal; you only need to distribute the material across the surface roughly.
Baking for saturation
Slide the baking sheet into the preheated oven for three to four minutes. Watch through the oven door. The cloudy wax streaks will suddenly turn translucent and glossy as the heat melts the composite deep into the weave. If dry, pale patches remain on the fabric, pull the tray out, touch the dry spots with a dab of wax from your brush, and return it to the oven for one minute.
Smoothing and lifting
Remove the tray. Working quickly while the sheet is hot, pull the natural-bristle brush across the surface to drag any excess pools of wax toward the dry edges or off onto the parchment. Pick up the fabric by two top corners using your fingertips. Hold it aloft in the room air for thirty seconds. The thin wax coating cools within moments, turning from molten liquid to dry, firm cloth before your arms get tired. Set the finished wrap on a clean counter to support ten minutes before using.
Washing, storing, and refreshing worn wraps after months of use
A well-made wrap survives regular use for eight to twelve months if cared for properly. Heat is the main factor that shortens their working life. Never expose the wraps to hot tap water, dishwashers, microwaves, or direct sunlight on a counter.
For daily cleaning, wipe the wrap down with a damp cellulose sponge and cold tap water. If the cloth covered something oily or moist, like a wedge of soft rind cheese, add a tiny drop of alcohol-free dish soap to your sponge. Lather gently using cold water, rinse clean, and pat dry with a kitchen towel or hang the wrap over a wooden dish rack. Never scrub the surface with abrasive scouring pads, which scratch off the wax coating.
Store clean, dry wraps flat in a shallow drawer, or roll them loosely and stand them upright in a wide ceramic crock. Keeping them rolled prevents hard creases from forming along the same lines repeatedly, which preserves the wax barrier across the center of the cloth.
Even with meticulous care, the wraps will eventually look tired. Crease lines will lighten, and the cloth will lose its grippy, tacky surface. Refreshing them requires no new cutting. Place the tired wrap back onto your dedicated parchment-lined baking sheet. If the fabric simply looks wrinkled, warm it in an 85-degree oven for three minutes to redistribute the existing wax. If the wrap has shed wax through months of washing, grate five grams of your solid block blend over the surface, let it melt in the oven, brush it smooth, and hang it to cool. The wrap will emerge with the same seal and body it had when first made.
Common mistakes to avoid
Careful attention to material choice and heat control eliminates almost all problems with DIY food wraps. Keep an eye out for these frequent issues:
- Over-saturating the cloth: Using too much wax creates a brittle sheet that cracks into heavy flakes when folded. The fabric weave should remain visible beneath the coating, not buried under a thick, glassy shell.
- Skipping the resin: Leaving out pine rosin makes the wrap feel pleasant but useless for sealing bowls. Hand heat alone cannot make pure beeswax adhere to smooth surfaces without resin.
- Wrapping raw animal proteins: Never wrap raw meat, poultry, or oily raw fish directly in a beeswax wrap. Because wraps cannot be sanitized with hot water or harsh bleaches, wrapping raw meats introduces food safety risks that cold-water washing cannot resolve. Consult local public health guidelines for proper raw protein handling.
- Melting rosin over high direct heat: Boiling the rosin-wax mixture scorches the resin, filling the kitchen with acrid smoke and darkening the finished wraps to an unappealing dark brown. Keep heat low and indirect.
Putting your scraps to work
Sort through your scrap basket and separate the pure linens and lightweight cottons from synthetics and knits. Cut two or three 8-inch squares to start. Making a modest test batch allows you to feel how your specific fabric weight absorbs the wax mixture and gives you an immediate feel for the handling characteristics of the cloth.
Once you have melted your first jar of beeswax, pine rosin, and jojoba oil, keep the leftover solidified blend stored directly in its heat-safe glass jar with the lid screwed on tight. Whenever a fresh batch of fabric scraps appears from your sewing projects, or your everyday wraps begin to lose their grip, simply place the jar back into a warm water bath, warm up your baking sheet, and put those forgotten textiles back to work.