
Old hand tools found in damp basements, barns, and flea market boxes often look worse than they actually are. Orange scale and flaking iron oxide can swallow an antique chisel or a solid cast-iron plane, hiding maker stamps and clean metal underneath. Before tossing these relics into a scrap bin or paying for harsh chemical dips, consider that a gallon of grocery store white vinegar and a handful of inexpensive brushes can do most of the heavy lifting. The process demands patience rather than brute force, turning crusty yard-sale castaways into reliable daily workhorses.
Restoring vintage tools is not merely about cosmetic shine. Old cast irons and high-carbon steels, especially those produced before the mid-twentieth century, often possess better metallurgical stability and edge retention than budget modern alternatives. When you strip away decades of oxidation, you expose steel that was forged, ground, and tempered by makers who expected their tools to last across generations. The method outlined below uses gentle, low-toxicity household chemistry combined with mechanical cleaning to preserve the original geometry and historical character of your tools.
Assessing structural pitting versus harmless surface rust
Before you pour a single drop of vinegar, you need to determine if the tool under inspection is structurally sound. Rust expands up to ten times the volume of the original steel it consumes, which means a terrifying layer of bright orange fuzz may only represent a few thousandths of a millimeter of actual metal loss. Conversely, dark, crusty scabs that have sat undisturbed in high humidity can bore microscopic caverns into the steel. This condition, known as deep pitting, permanently removes parent metal and can compromise the mechanical safety of striking or cutting tools.
Start by scraping away the loosest scale with a dry nylon scraper or the edge of a brass coin. Take a close look at high-stress areas. On an adjustable wrench, examine the rack teeth and the thin web of the moving jaw. On cold chisels and claw hammers, inspect the striking face and the eye where the handle mounts. If you notice cratering that exceeds roughly 0.8 millimeters in depth on structural stress points, the tool may fracture under load. If you suspect an antique tool has deep structural cracks alongside heavy corrosion, consult a professional metallurgist or a qualified toolmaker before striking it with a hammer.
Cutting tools require an even stricter standard. A plane iron or wood chisel can have moderate pitting along its main body, but the rear face, specifically the first 25 millimeters back from the cutting edge, must be capable of being lapped flat. If pitting has hollowed out the flat reference face, the tool will produce a ragged, serrated edge no matter how long you spend on your sharpening stones.
| Condition | Visual and Tactile Indicators | Safety and Function Impact | Salvage Recommendation |
|---|---|---|---|
| Harmless Surface Rust | Bright orange to light brown powder; wipes away partially on a dry rag; smooth base metal beneath. | Negligible; moves parts may stick, but underlying mass is intact. | Full restoration candidate. Soak briefly and scrub. |
| Moderate Oxide Scale | Dark brown to reddish flakes; crusty texture; requires firm fingernail pressure to dislodge. | Tolerances may loosen; micro-pitting under scale; cutting edges need regrinding. | Good candidate for secondary tools, clamps, and non-precision handles. |
| Deep Structural Pitting | Black magnetite craters; notched edges; metal feels spongy or jagged along stress lines. | High risk of sudden brittle fracture under heavy torque or impact loads. | Retire from active use; keep as wall display or repurpose for low-stress duties. |
Setting up a safe vinegar bath and soak timing
The chemistry behind this method relies on standard distilled white vinegar, which contains approximately 5% acetic acid by volume. Acetic acid is a mild chelating agent that reacts with iron oxide to form water-soluble iron acetate and hydrogen gas. Because it is weak, it attacks iron oxides significantly faster than it attacks unoxidized metallic iron. Vinegar will do plenty of work on its own, which gives you permission to put the kettle on and walk away, but leaving metal submerged indefinitely will eventually cause acid etching and leave your tools with a dull, gray, porous finish.
Always dismantle tools completely before soaking them. Remove wooden tote handles, plastic adjustment knobs, brass screws, and internal steel coil springs. Wood will absorb the acidic liquid, swelling and splitting along the grain, while brass can suffer dezincification or cause unwanted galvanic reactions when submerged alongside steel. Use deep polyethylene (HDPE) plastic basins, heavy glass trays, or polypropylene bins. Avoid aluminum pans and galvanized metal troughs, as the acid will dissolve their protective zinc or aluminum coatings within hours.
Submerge the steel parts so they are entirely covered by liquid. If parts stick out into the air, the fluid boundary line creates a localized corrosion cell that can produce deep etch lines across your tool. Monitor your soak times using the following schedule:
- Light dustings: Check the metal after 3 to 4 hours. You should see fine bubbles forming across the surface.
- Medium corrosion: Soak between 8 and 14 hours. The liquid will turn a murky, yellowish amber as the iron dissolves.
- Heavy, encrusted barn tools: Allow up to 20 or 24 hours, but inspect the metal every 6 hours.
Never leave precision tools or carbon-steel springs in vinegar for more than 24 hours. Thin springs can suffer from hydrogen embrittlement, a phenomenon where hydrogen atoms lodge in the crystalline matrix of stressed steel, causing sudden snapping when the spring is next compressed.
Scrubbing with brass wire brushes without scratching steel
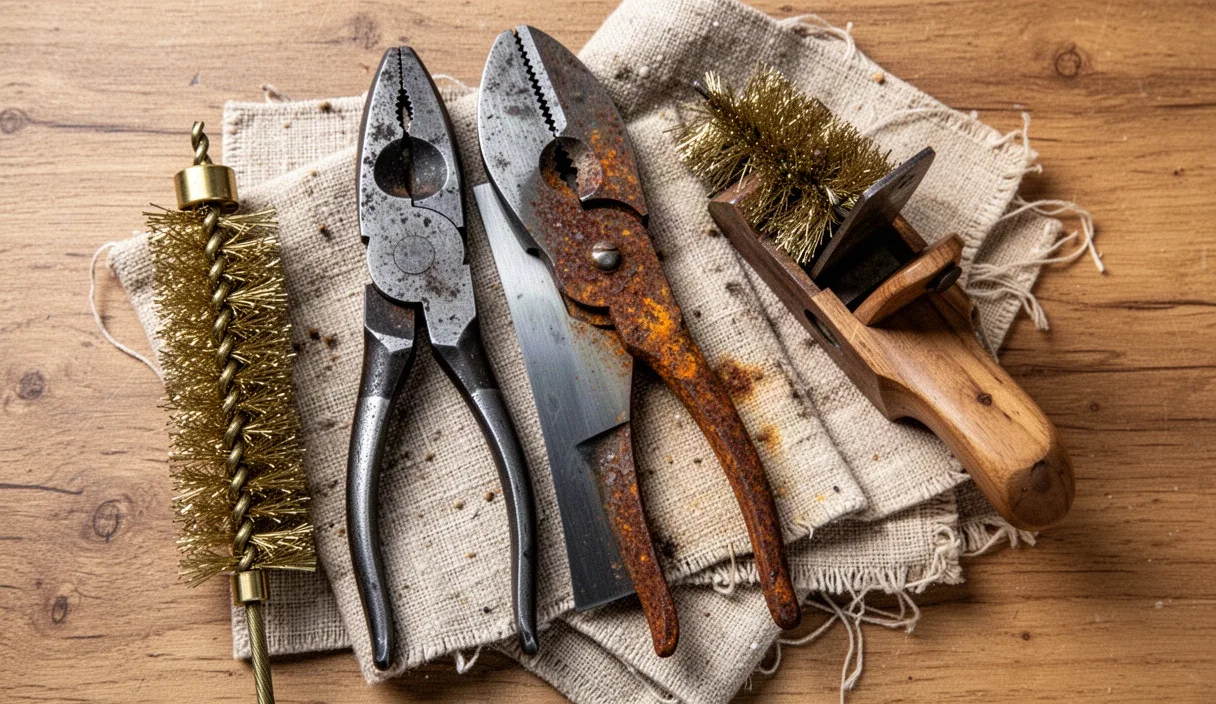
Once the vinegar has softened the rust into a slimy black paste, mechanical removal can proceed. Many restorers reach instinctively for a high-speed steel wire wheel mounted on a bench grinder. This is a mistake for fine tools. Steel wire wheels spin fast enough to fling bristles, round over crisp factory bevels, and leave aggressive swirl patterns across vintage logos and mill marks. Brass is the better choice.
Brass registers lower on the Mohs hardness scale than hardened tool steel. A brass bristle will shear away the softened iron oxide matrix without digging into the underlying base metal. You can find brass brushes in several formats: small hand brushes shaped like toothbrushes for joints, larger shoe-handle brass brushes for flat castings, and brass cup wheels meant for variable-speed drills running at modest speeds under 1200 RPM.
Keep the tool damp during the brushing process. Dipping the brush directly into your rinse bucket keeps the abrasive slurry lubricated, preventing dislodged rust grit from scouring lines into the steel. Work along the original factory machining marks whenever possible. For plane soles, scrub parallel to the sides; for chisel shafts, scrub lengthwise. As the black oxide releases, wipe the area with a wet cloth to inspect the surface. You may notice a faint yellowish tint where the soft brass leaves trace transfer on the rough steel. This microscopic brass haze easily wipes away with a non-woven synthetic abrasive pad dipped in soapy water.
Neutralizing remaining acidity to prevent flash rust
Taking a tool directly from a vinegar bath and letting it air-dry is a recipe for instant disappointment. The moment the acidic steel meets atmospheric oxygen, flash rust develops. Within 90 seconds, your freshly scrubbed tool can turn an aggressive shade of bright orange as the residual acid catalyzes rapid oxidation across the clean, raw metal.
To halt this process, you must neutralize the acid by submerging the parts in an alkaline bath. Prepare a neutralizing tank using clean, warm water and sodium bicarbonate (household baking soda). Dissolve roughly 60 grams of baking soda per 4 liters of hot water. As soon as you finish the brass brush scrub, plunge the tool straight into this alkaline mixture. You may observe tiny carbon dioxide bubbles forming as the residual acetic acid is converted into neutral salts.
Let the tool sit in the neutralizing tank for 10 to 15 minutes to allow the alkaline fluid to penetrate threaded blind holes, joint pivots, and microscopic surface pores. Once neutralized, remove the tool and rinse it thoroughly under a stream of clean tap water, then execute the following moisture-removal steps immediately:
- Blot the heavy moisture off with clean microfiber towels, avoiding old shop rags that might carry road grime or salt.
- Blow out hinge pins, adjustment screws, and blind holes using compressed air regulated to 60 PSI.
- Evaporate trapped micro-droplets by warming the tool with a shop heat gun set to 65 degrees Celsius, moving the nozzle continuously so the steel gets warm to the touch without affecting its temper.
Sharpening cutting edges and protective oil finishes
Acid baths leave clean steel chemically naked. With all oxides stripped and surface moisture baked away, raw iron is exceptionally vulnerable to ambient humidity. The final phase involves restoring cutting geometries and sealing the porous metal against moisture.
For cutting tools like chisels, drawknives, and block planes, begin sharpening on a flat reference plate. The vinegar bath will have exposed the true condition of the bevel. Begin on a 320-grit diamond plate or wet waterstone to re-establish a straight primary bevel, grinding away any micro-pitting that reached the apex of the edge. Progress to an 800-grit medium stone, followed by a 3000-grit or 6000-grit finishing stone. Flatten the back of the blade until a mirror polish forms along the cutting perimeter. Clean away all sharpening swarf with light mineral oil rather than water to avoid reintroducing moisture to freshly cut surfaces.
Once sharpened, apply a long-term barrier finish. Hand tools live in unheated spaces where temperature swings cause condensation. Different components demand specific protective coatings:
- Unlacquered raw steel: Apply a thin coat of boiled linseed oil or paste wax containing carnauba. Buff the wax vigorously with a dry flannel cloth after 20 minutes. The resulting microcrystalline film locks out air without feeling sticky.
- Internal threads and pivots: Lubricate threaded rods, adjusting wheels, and pliers pivots with a few drops of non-gumming 3-In-One oil or light machine oil with anti-corrosion additives.
- Food or garden contact tools: If restoring an herb chopper, grafting knife, or soil trowel, use pure food-grade USP mineral oil or refined camellia seed oil instead of petroleum derivatives or drying oils.
Common mistakes
A frequent error is forgetting about galvanic action. When tools composed of disparate metals, such as steel pliers with brass rivets or zinc-plated brackets, are left in an electrolyte bath like vinegar for extended periods, the less noble metal sacrifices itself. Zinc will strip off rapidly, and brass can cause pitting in adjacent steel surfaces. Keep mixed-metal assemblies out of long-term acid soaks.
Another common misstep is relying on excessive soak time rather than physical brushing. Many workers drop a heavily rusted tool into vinegar and leave it for five days, assuming it will emerge looking brand new. Extended soaks eat away solid iron along grain boundaries, leaving the steel looking like gray cast stone with a chalky, dead surface texture. It is far safer to soak for 6 hours, scrub, and return the part to the bath for another 4 hours if stubborn spots remain.
Practical next steps
To begin restoring your hardware, select one simple, non-critical item first, such as an old pair of rusted slip-joint pliers or an inexpensive open-ended wrench. Gather your materials before you pull the tool apart: a heavy plastic container large enough to lay the tool flat, 4 liters of standard 5% white distilled vinegar, a box of baking soda, a soft brass hand brush, and clean microfiber cloths.
Document your disassembly by taking photos of complex mechanisms, spring orientations, and thread directions before parts go into the liquid. Keep a small notebook on your bench to log soak start times, and set a timer so parts are never forgotten overnight. Once you see how readily safe chemistry and mild mechanical scrubbing lift years of neglect, you can expand your salvage efforts to complex bench planes, antique saws, and family heirloom tools with steady confidence.