
Secondhand table lamps turn up everywhere: church basements, curb piles, and the dusty back corners of salvage barns. Many of them possess thick cast-iron bases, hand-turned walnut columns, or heavy art-pottery vessels that outclass most fixtures sold today. What they usually lack is sound electrical wiring. After forty or fifty years, rubber-insulated cords turn brittle enough to snap like dry pasta, socket switches gum up with old grease, and cardboard insulators break down into fire-prone dust.
Rewiring an ordinary portable table lamp is one of the most practical small electrical projects you can undertake at a domestic workbench. The entire system is accessible, the component parts cost only a few dollars, and modern replacement hardware fits standard antique pipe dimensions remarkably well. With an afternoon of focused work and a digital multimeter, you can bring a vintage find into dependable service without compromising its historic character.
Examining vintage lamp components for damage
Before you purchase replacement parts, set the lamp on a clean, well-lit surface and strip away any clip-on shade or harp. Your first task is to assess the structural core of the fixture. Most table lamps are held together by a central hollow pipe known in North American trade sizes as 1/8 IPS (Iron Pipe Size), which despite its nominal fraction measures approximately 3/8 inch in outside diameter. Check whether this central rod is straight and whether the decorative elements stacked along it are stable or spinning loosely.
Examine the body for structural cracks. Ceramic urns, porcelain vases, and cast-resin housings cannot safely support an electrical assembly if structural fractures run across stress points. Look closely at the cord exit hole near the base. Older lamps often ran the wire directly through drilled brass or cast iron without a protective rubber or plastic grommet. Over decades of movement, the raw metal edge can wear a razor-sharp groove into the passage, creating an invisible hazard for any fresh wire pulled through it.
Inspect the metallic socket cluster at the top. Original brass shells often carry charming patent dates, but the interior switch mechanisms, whether rotary, push-through, or pull-chain, wear out internally. If the switch feels spongy, fails to produce a crisp mechanical click, or requires gentle wiggling to stay in an operating position, plan to replace the entire interior assembly. You should also inspect the socket base, called the socket cap. If its mounting threads are stripped or cross-threaded onto the central pipe, you will need a matching cap replacement to ensure the lamp head does not wobble under the weight of a shade.
Take note of any ungrounded metallic surfaces. Lamps constructed before the mid-1970s almost universally made use of unpolarized, two-conductor cords without a dedicated ground path. While modern two-wire replacement cords with polarized plugs provide a significant safety upgrade, fixtures with extensive, accessible metal frames benefit from a rigorous inspection to confirm that no internal wire touches the outer shell at any point.
Tools and cord kits suited to domestic voltage
Rewiring standard 120-volt domestic lighting requires only a handful of reliable hand tools and hardware rated by recognized testing laboratories such as UL (Underwriters Laboratories) or ETL. Do not reuse old wire or mystery sockets salvaged from other broken lamps. Fresh electrical parts are inexpensive and eliminate hidden insulation faults from the outset.
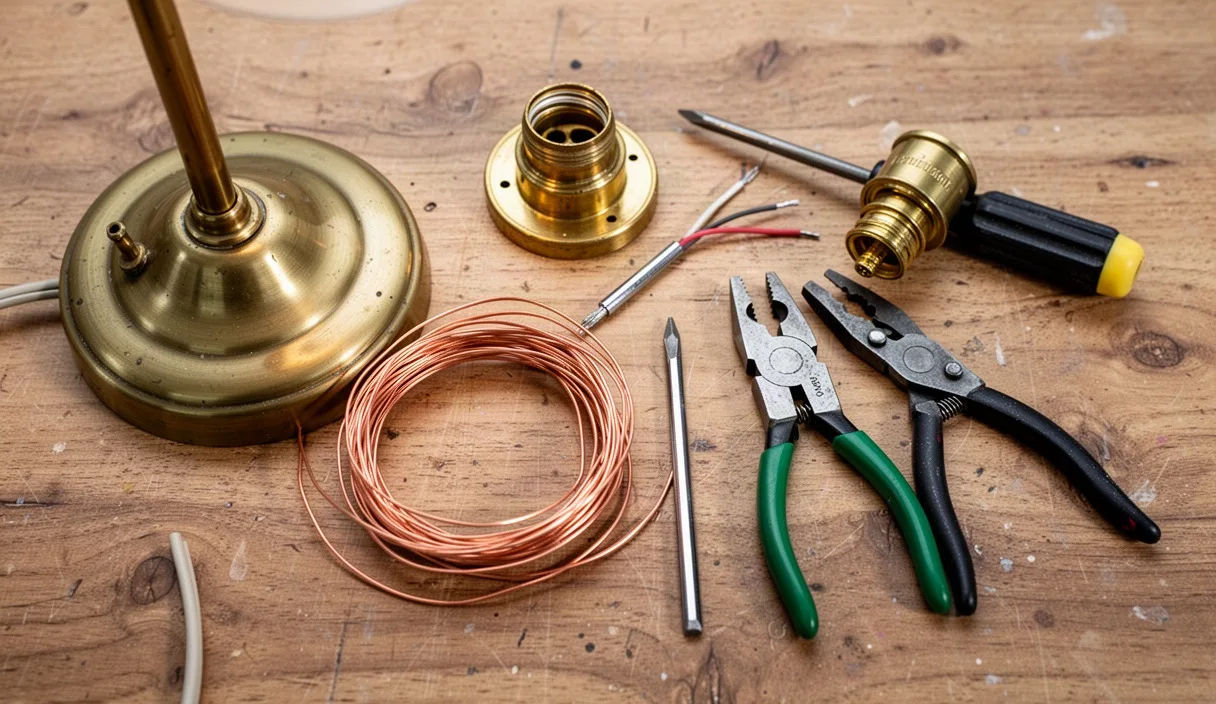
For your workstation, gather a wire stripper calibrated for small gauge conductors, a number two slotted screwdriver with a narrow shank, standard slip-joint pliers, needle-nose pliers, an adjustable wrench, a utility knife, and a digital multimeter. A roll of electrical tape and a small tube of thread-locking compound can also be helpful during final assembly.
When selecting wire, purchase stranded copper lamp cord, technically designated as SPT cord. This cord consists of two parallel conductors encased in thermoplastic insulation. The gauge is almost universally 18 AWG, which safely carries the current drawn by residential lighting circuits.
| Cord Designation | Insulation Thickness | External Width | Best Application |
|---|---|---|---|
| SPT-1 | 0.030 inches | Approximately 0.27 inches | Narrow threaded rods, small antique tubes, delicate table fixtures |
| SPT-2 | 0.045 inches | Approximately 0.38 inches | Standard table and floor lamps where interior pipe diameter permits |
SPT-2 cord provides heavier abrasion resistance thanks to its thicker jacket, making it the preferable choice whenever the central rod is wide enough to let it slide freely. However, many delicate European imports or tight antique cast pipes will only accept the slimmer SPT-1 profile. Look for cord sets with a factory-molded, polarized plug. A polarized plug has one wide neutral blade and one narrow hot blade, which ensures that line voltage connects exclusively to the protected center contact inside the bulb socket rather than the exposed exterior screw shell.
Choose an E26 standard medium-base socket that matches your original fixture. These are readily available with solid brass, brass-plated aluminum, or nickel-finished outer shells. Ensure the socket package includes a fresh cardboard insulating sleeve. That unassuming paper cylinder is an essential dielectric barrier; never install a metal-shelled socket without it.
Disassembling the base and threaded rod
Unplug the lamp if someone has experimentally plugged it into a wall outlet, and clear a soft workspace covered with a folded towel to avoid marring decorative finishes. Turn the lamp upside down to inspect the base. In many vintage designs, the bottom casting is sealed with an adhesive felt pad. Peel this felt back carefully using a utility knife. If it disintegrates, you can clean off the old glue later and install a fresh sheet of adhesive wool felt during final cleanup.
Underneath the felt, you will find a recessed nut and washer securing the central threaded rod. Apply an adjustable wrench or a socket wrench to this bottom nut. If the entire rod spins along with the nut, grip the socket cap at the top of the lamp with your free hand or a pair of padded pliers to hold the shaft steady. Once the bottom nut is backed off, the stacked parts of the lamp, such as the base plate, decorative break, column spacers, and vase body, can slip out of alignment, so keep a firm hand on the assembly.
Moving to the socket at the top, inspect the brass shell for the word "PRESS" stamped into the metal near the switch cut-out. Press firmly on this stamped spot with your thumb or the flat blade of a screwdriver while gently rocking and lifting the outer shell upward. With sufficient pressure, the locking teeth of the shell will release from the socket cap below, exposing the socket interior and the wiring terminals.
Loosen the two terminal screws holding the old wires to the socket body. Pull the copper free, discard the old socket interior, and pull the old cord downward through the central pipe and out through the base exit hole. If the old cord is stuck, swollen with age, or snagged on internal burrs, clip off the frayed copper ends at the top, strip half an inch of clean conductor, and splice your new cord to the old one using a tight wrap of electrical tape. You can then pull the old wire out through the bottom, using it as a drawline to thread the fresh wire upward into position.
Tying an underwriter knot for mechanical relief
A lamp cord must never rely on terminal screws alone to resist physical pulls. If an errant pet or a stumbling houseguest catches their foot on the cord, that mechanical force should bear against a secure physical barrier rather than ripping the bare conductors loose from the electrical switch. The historic and code-compliant method for achieving this inside a socket cap is the underwriter knot.
Before preparing the wire, slide your new cord up through the base, along the hollow rod, and out through the bottom socket cap. Thread the socket cap onto the top of the rod and tighten its set screw firmly so the cap cannot spin. Pull roughly five to six inches of cord through the top of the cap to give your hands enough room to work comfortably.
Split the two conductors of the SPT cord down the center seam using a utility knife to start a tiny nick, then pull them apart with your fingers until they are separated for roughly three inches. Take care not to slice through the outer insulation to expose raw copper during this split. Once separated, arrange the two loose legs so they resemble an open "V" facing upward.
Forming the knot requires a specific sequence of loops:
- Take the left-hand wire and bend it downward and behind the main trunk of the cord, bringing its tail forward toward the right side to create a loop on the left.
- Take the right-hand wire, pass it across the front of the main trunk, route it through the loop you formed on the left side, and wrap it behind the assembly.
- Push the tail of the right-hand wire forward through the loop remaining on the right side.
- Grasp the tips of both conductors and pull them outward evenly while sliding the emerging knot down toward the base of the split.
Work the knot down until it is compact, tight, and symmetrical. It will resemble a small, balanced pretzel resting directly above the socket cap opening. When you pull gently on the cord from down at the base of the lamp, the knot should settle securely into the lower pocket of the socket cap, mechanically blocking any downward travel and preventing any pulling strain from reaching the terminal screws above.
Connecting hot, neutral, and ground wires securely
With the mechanical strain relief established, you are ready to prepare the copper conductors. Strip approximately 5/8 inch of thermoplastic insulation from the end of each wire using your wire strippers. Twist the fine copper strands of each conductor tightly between your fingertips in a clockwise direction to form a dense, uniform bundle without wild hairs or frayed strands.
Identify the neutral wire from the hot wire. Because parallel lamp cords are molded in a solid color, manufacturers distinguish them using tactile and visual ridges:
- The Neutral Conductor: The outer insulation jacket features longitudinal ridges, ribs, or deep grooves along its entire length. This wire always connects to the silver-colored terminal screw on the socket interior.
- The Hot Conductor: The outer insulation jacket is completely smooth and often carries fine printed manufacturing specifications. This wire always connects to the brass-colored terminal screw.
This polarity mapping is non-negotiable for domestic electrical safety. The silver screw routes current directly to the threaded outer shell of the socket, while the brass screw routes current to the spring-contact tab buried deep in the bottom of the socket cavity. When wired correctly, the exposed threads of an inserted light bulb remain neutral, dramatically reducing the risk of a severe shock if your finger brushes the metal base while turning a bulb into the fixture.
Bend the stripped copper ends into small "U" shapes with needle-nose pliers. Hook each loop around its corresponding terminal screw in a clockwise direction. Placing the hook clockwise ensures that as you drive the screw down tight with your screwdriver, the rotational force draws the copper wire inward beneath the screw head rather than squeezing it outward. Drive both screws down until the copper is firmly clamped. Inspect the connection closely: no stray copper hair may bridge the gap between terminals, and the plastic insulation should run up close to the screw head without being pinched underneath it.
Slide the cardboard insulating sleeve over the socket interior, ensuring it completely encases the terminal screws. Push the brass outer shell down over the insulator, line up the switch notch, and snap the shell firmly into the socket cap. You should hear a sharp metallic click as the locking tabs on the cap seat into the rim of the shell. Pull upward on the shell to confirm it is mechanically locked and cannot pull free.
Testing the completed assembly before plugging in
A rewiring job is not finished when the parts snap together; it is finished when measured continuity confirms your work. Do not plug the lamp into an active wall receptacle to see if it works. A simple, three-minute checkout with a digital multimeter ensures that the fixture has no direct short circuits and that polarity is fully preserved.
Switch your multimeter to the continuity setting, which emits an audible tone when the two test leads touch, or select the lowest resistance scale (measured in ohms). Leave the lamp entirely unplugged from the wall, and do not install a light bulb yet.
- Verify Hot Continuity: Place one multimeter probe against the narrow blade of the wall plug. Place the second probe against the small brass tongue contact deep at the bottom center of the socket. Turn the lamp switch on. The meter should beep or read near zero ohms, indicating a direct circuit path. Turn the switch off; the meter should go silent and display infinite resistance (open circuit).
- Verify Neutral Continuity: Place one probe on the wide blade of the plug. Place the second probe against the threaded metal screw shell inside the socket. The meter should sound immediately with zero ohms of resistance. Turning the switch on or off should have no effect on this reading, as the neutral line runs uninterrupted directly to the shell.
- Check for Short Circuits: Touch one probe to the narrow plug blade and the other probe to the wide plug blade. With the socket switch in both the on and off positions, the meter must remain completely silent, showing infinite resistance. If you hear a beep or read low resistance across the plug blades without a bulb installed, you have an internal short circuit that must be found and corrected before line power is applied.
- Check for Chassis Ground Faults: Place one probe on the narrow hot blade of the plug, and touch the second probe to every accessible metal part of the lamp frame, including the central rod, the socket shell, and the cast base. Repeat the test starting from the wide neutral blade. Both tests must register completely open circuits. If the meter registers continuity to the outer metal body, a pinched wire or an uninsulated screw head is contacting the chassis.
Only after the multimeter verifies zero short circuits and correct polarity should you turn the switch off, screw in an appropriate household bulb, plug the fixture into a standard wall outlet, and switch it on.
Common mistakes
Even carefully planned wiring tasks can suffer from small oversights that compromise performance or safety. Watch out for these frequent assembly pitfalls:
- Reversing Hot and Neutral: Connecting the smooth wire to the silver screw energizes the bulb's outer screw threads. While a light bulb will still illuminate with reversed polarity, the fixture poses an immediate shock hazard to anyone changing the bulb or dusting near the top rim.
- Discarding the Cardboard Sleeve: Some restorers assume the brown cardboard liner inside the brass socket is temporary shipping packing. It is an electrical insulator. Operating a metal socket without this sleeve allows the terminal screws to arc directly to the outer brass casing.
- Omitting the Cord Bushing: Pulling the lamp cord through an unlined metal hole in a cast base guarantees that the insulation will eventually wear through. Always install a snap-in plastic bushing, a split rubber grommet, or an antique-style threaded cord grip at the exit point.
- Overtightening Stacked Castings: When tightening the bottom nut on antique ceramic or slag-glass lamps, applying too much mechanical leverage with a long wrench can instantly crack historic body components. Tighten hardware until snug, but rely on lock washers or a drop of thread locker rather than raw torque to keep the assembly tight.
- Under-twisting Stranded Wire: If individual strands of copper fan out during terminal screw installation, a single loose strand can contact the outer brass shell, causing an intermittent ground fault that is difficult to diagnose visually.
Next steps for your restored lamp
With the electrical internals verified and working, you can complete the cosmetic restoration of the base. Cut a circle of green or brown wool craft felt slightly smaller than the footprint of the bottom casting. Coat the bottom rim of the base with a thin film of craft glue or apply adhesive-backed felt directly to the cleaned metal surface. This protects tabletop wood from scratches and conceals the lower recessed nut and wire run.
Choose an appropriate light source for the fixture. Standard household E26 sockets carry physical stampings indicating their maximum ratings, frequently marked as 250W/250V or 660W/250V. Modern LED filament bulbs offer an ideal match for vintage lamps: they emit warm, visually appropriate light through antique glass or fabric shades while drawing less than 15 watts of power. Because LEDs generate very little ambient heat, they also protect the newly installed socket insulator, internal knot, and adjacent finishes from thermal degradation over years of daily use.
Finally, know the limits of standard DIY lamp restoration. Simple single-socket table lamps are straightforward to rewire safely. However, if your salvage project involves complex floor fixtures with internal weights made of deteriorating lead, fixtures with built-in clockwork mechanisms, antique chandeliers with continuous internal branches, or vintage wiring that cannot be completely replaced from plug to socket, set the piece aside and consult a licensed electrician or an established antique lighting restoration specialist.